How to Screenshot on Mac: 4 Easy Methods
Summary: If you’re a Mac user, taking screenshots is a common task that you might need to do frequently. Whether it’s to capture an important conversation or to save an image for future reference, knowing how to take screenshots like a pro can be a valuable skill. In this article, we’ll introduce you to four ease methods to take screenshots on your Mac.
- • Enlarge photos up to 40x with more details added
- • Sharpen photos by reducing background/chroma/luminance blur
- • Make photos clearer by removing motion blur and out-of-focus blur
- • Suitable for both beginners and experts
How to Screenshot on Mac via Keyboard Shortcuts
Taking screenshots on your Mac has never been easier, thanks to keyboard shortcuts. With just a few key presses, you can capture your whole screen or select portions of it. Here are the three primary keyboard shortcuts you need to know.
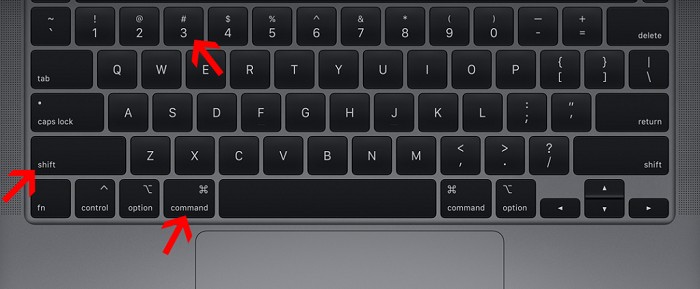
Using Command + Shift + 3 to Capture the Entire Screen
The easiest way to take a screenshot on Mac is to use the Command-Shift-3 key combination. This keyboard shortcut grabs a screenshot of your whole screen and save it as a .png file on your Mac desktop. This shortcut is useful for those who do not want to waste time and needs to take a screenshot of the entire screen.
Using Command + Shift + 4 to Take a Partial Screenshot
This shortcut lets you capture a portion of your screen. When you’re ready to take the screenshot, release your mouse or trackpad button. The screenshot will be saved as a .png file on your desktop. Here are the detailed steps to take screenshots on Mac:
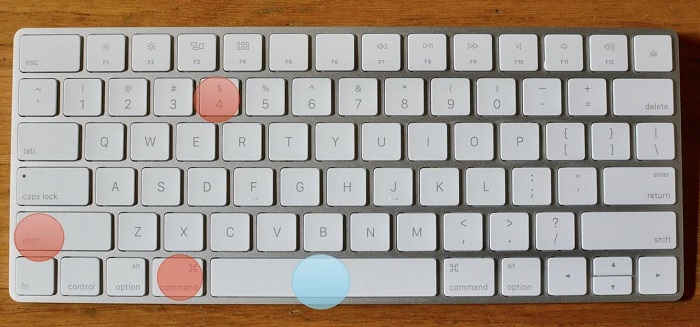
Using Command + Shift + 4, then Space Bar to Capture a Specific Window
This shortcut lets you capture a specific window. Once you press these keys, your cursor will turn into a camera icon that you can use to select the window you want to capture.
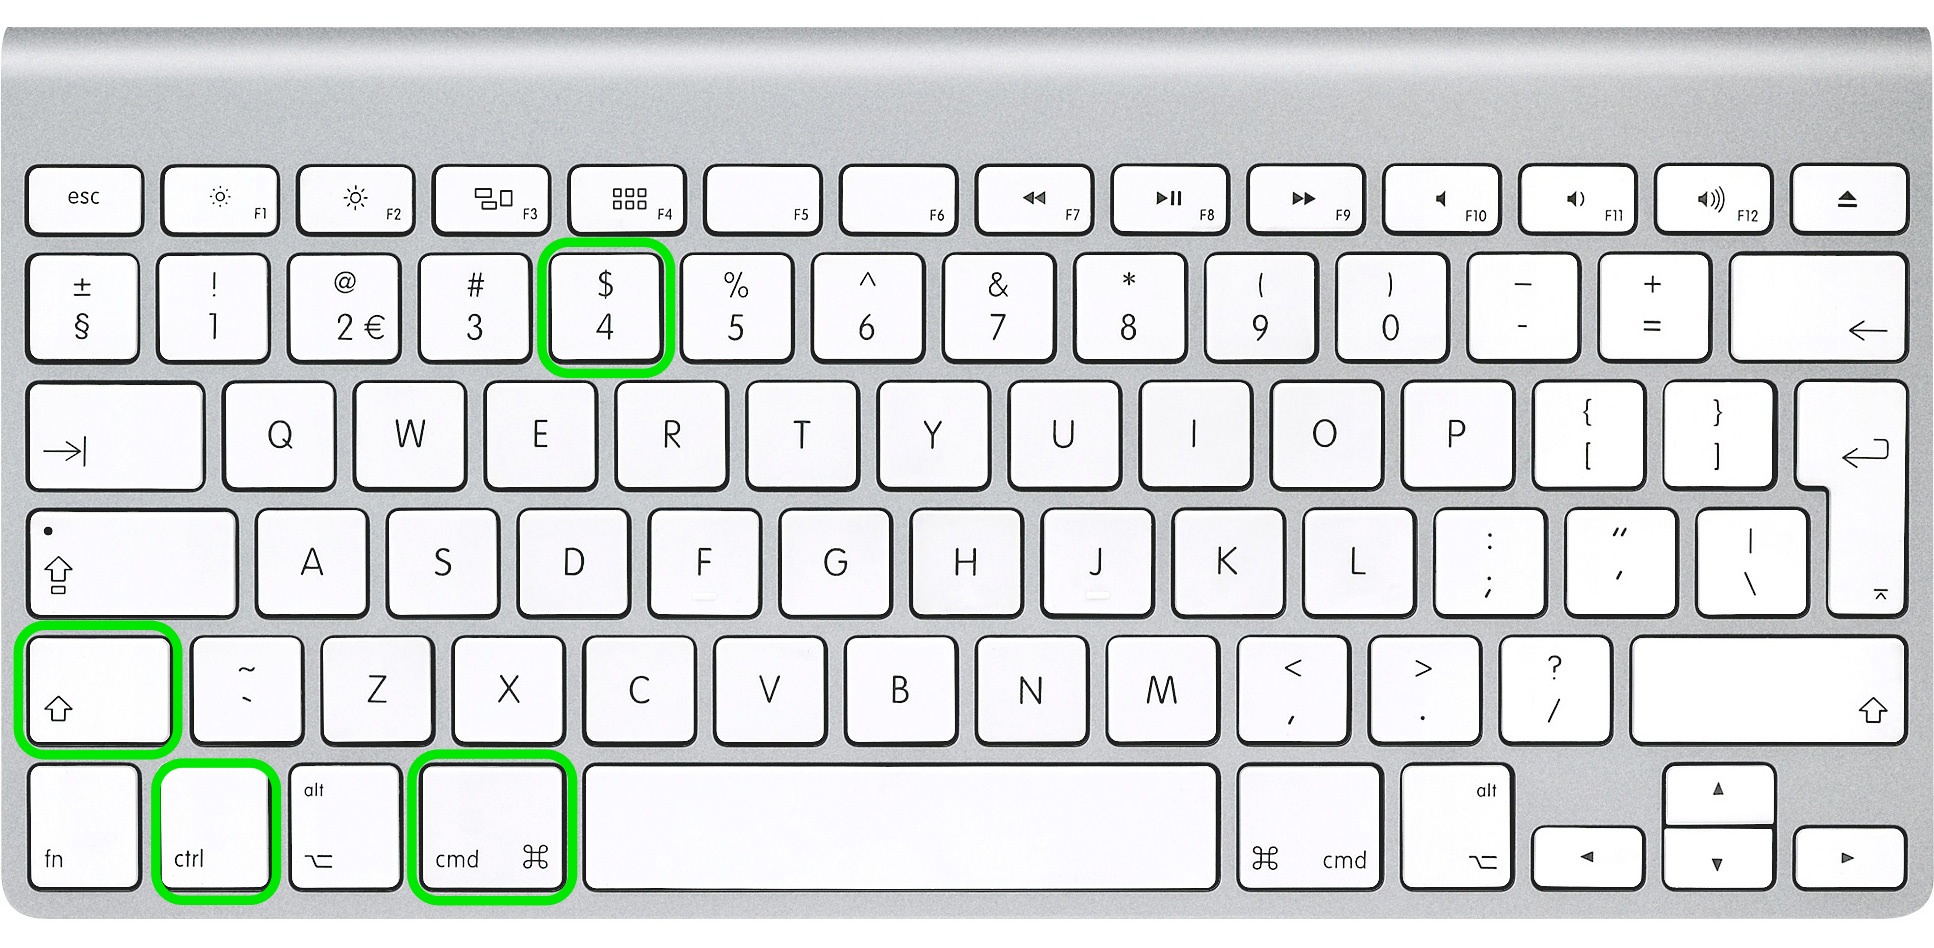
Using keyboard shortcuts for screenshots is not only quick and easy, but it also saves you time compared to using other methods. Plus, it’s a great way to take screenshots when you don’t have access to a mouse or trackpad.
If you want to get even more out of your keyboard shortcuts, you can customize them to suit your needs. To do this, open System Preferences, click on Keyboard, then on Shortcuts. From there, you can customize your keyboard shortcuts for screenshots by clicking on Screen Shots in the left-hand column.
How to Screenshot on Mac via Touch Bar
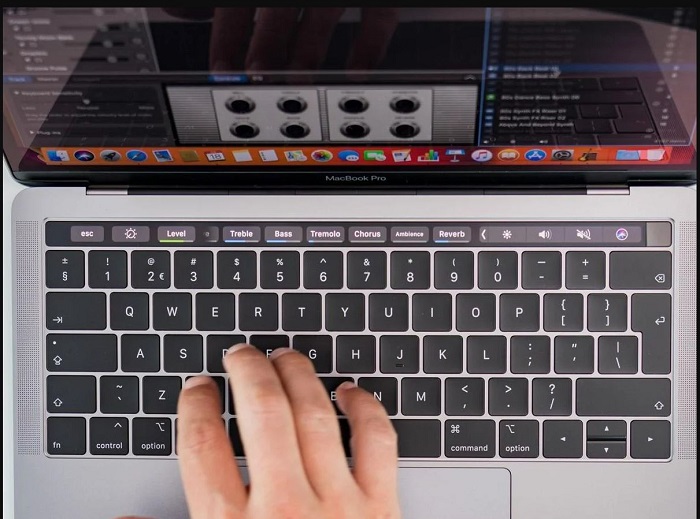
If you are one of the users that have brought the latest Mac device with a Touch Bar, then this method will be definitely helpful to you to know how to take a screenshot on Mac. The 16-inch MacBook Pro or similar device with the Touch Bar can be used to take screenshots.
To take a screenshot on Mac using the Touch Bar, follow these simple steps:
Once you’ve taken your screenshot, it will appear as a thumbnail in the bottom-right corner of your screen. You can click on the thumbnail to edit or share the screenshot or drag it directly into an application.
In addition, you can also use shortcut actions to trigger this function. Just click the Command-Shift-6 key combination to take a very skinny and wide screenshot of your Touch Bar. Even though this might not be helpful for some users, it is a very handy shortcut and might be helpful for you in many cases.
How to Take a Screenshot on Mac via Preview App
If you’re looking for a simple and straightforward way to take screenshots on your Mac, look no further than the Preview app. This built-in app is not just for viewing images or PDFs but also has a handy screenshot feature that allows you to capture your screen with ease.
To use Preview app for taking screenshots on Mac, follow these simple steps:
One great thing about using Preview app for taking screenshots is that it’s incredibly versatile. You can choose to capture a specific portion of your screen or grab the entire display. Plus, you have the option to edit and annotate the screenshot before saving it as an image file.
Another benefit of using Preview app is that it’s already installed on your Mac, so there’s no need to download any additional apps or software. It’s a convenient and reliable way to take screenshots quickly and efficiently.
How to Take a Screenshot on Mac with the Built-in Screenshot Tool
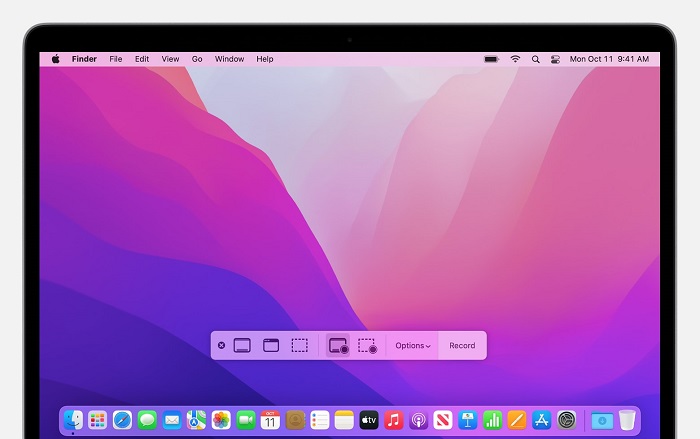
The built-in screenshot tool was introduced in 2018 for MacOS Mojave and later versions. In order to trigger this tool, you could press the key combination: Command + Shift + 5, which will call up a tiny panel on your screen at the bottom with options for your screen capture.
To take a screenshot on a Mac using the built-in screenshot menu, follow these steps:
- Capture Entire Screen: Clicking this will turn your cursor into a small camera icon and taking a picture of your entire screen when you click.
- Capture Selected Window: This option turns your cursor into a camera as well, but allows you to select which window to capture by clicking it.
- Capture Selected Portion: You can select an area of the screen that you want to capture by dragging over it with the crosshair cursor.
Use DVDFab Photo Enhancer AI to Make Your Screenshot Look Better
Capturing screenshots is an essential aspect of using a Mac, whether for work or personal use. However, sometimes the quality of these screenshots can be subpar, which can be frustrating. Fortunately, with the DVDFab Photo Enhancer AI software, you can easily and quickly enhance your screenshots to make them look better.
DVDFab Photo Enhancer AI is an advanced image enhancing tool that uses artificial intelligence to improve the quality of your images. With its advanced algorithms, this software can detect and correct various image issues such as color distortions, low resolution, and lack of sharpness. Moreover, DVDFab provide seven different AI models to help you improve the overall appearance of your screenshot.
Watch this short videos to learn ow to make your screenshot look better with DVDFab Enhancer AI:
FAQs
Yes. All you have to do is just press and release the On/Off, Sleep/Wake, and Home buttons at the same time. A flash of the screen allows you to know that the screenshot was captured.
Yes. On your iPad with a Home button at the same time press and then let go off the Home button and the top button. On other iPad models at the same time press and then release either volume button and the top button (on iPad’s top-right edge).
If your iPad is not responding to screenshots, try one of the following methods:
- Restart or force restart your iPad
- Press and hold the Home + Power buttons at the same time
- Check the iPad Home button works well
- Take a screenshot on iPad with 3D Touch
- Take a screenshot on iPad using Assistive Touch
Conclusion
In conclusion, knowing how to take screenshots on your Mac is a practical skill that can significantly enhance your productivity. These four methods we've discussed provide you with the flexibility to capture entire screens or specific areas based on your needs. Remember, practice makes perfect - the more you use these techniques, the quicker and easier they'll become. Now go ahead and start capturing those important moments and information like a pro!

