HDMI eARC and HDMI 2.1 Demystified: Everything You Might Want to Know
Summary: What are HDMI eARC and HDMI 2.1? These terms can be confusing, even if your new smart TV supports them. In this article, we’ll explain how they work and how they can boost your audio and video quality for Blu-ray and 4K movie viewing at home.
Table of Contents
In a recent minor update, DVDFab 13 announced the support to convert Blu-rays and 4K Ultra HD Blu-rays to MP4 videos preserving the high-definition audios, such as the Dolby TrueHD, Dolby Atmos, DTS-HD Master Audio or DTS:X, in its Blu-ray Ripper and UHD Ripper modules with the newly introduced MP4.TrueHD.eARC conversion profile.
i Free Download i Free Download
So here it brings us back to the eARC again, what is eARC? Why is it so important if I want to experience the true magic of high-definition audios? Continue your exploration to find the answer.
Demystify HDMI eARC and HDMI 2.1, What Are They Exactly?
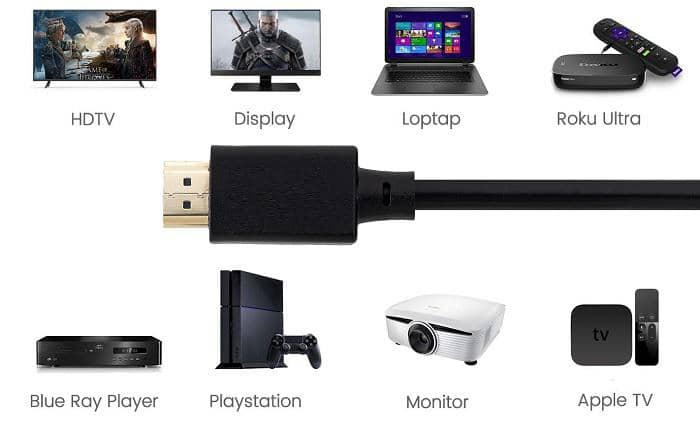
Even if you’re not quite an audiophile, you might still know something about HDMI, which has been into our daily life for almost two decades, and nearly all the laptops, smart TVs, AMPs (amplifiers), soundbars, game consoles, projectors, DSLRs today come equipped with at least one HDMI socket. It might hard for you to name an AV device of nowadays that is not HDMI enabled, except for a smartphone and a tablet, on which even the traditional 3.5mm audio jacket has been removed, less alone adding an HDMI socket.
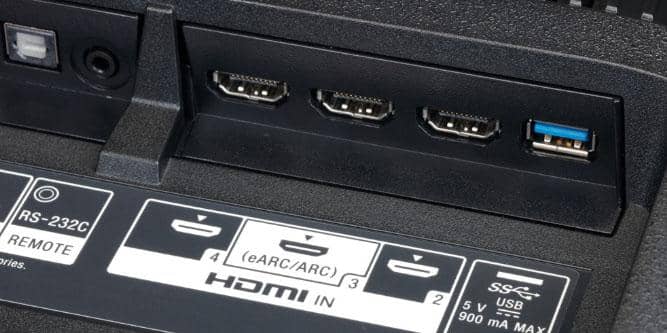
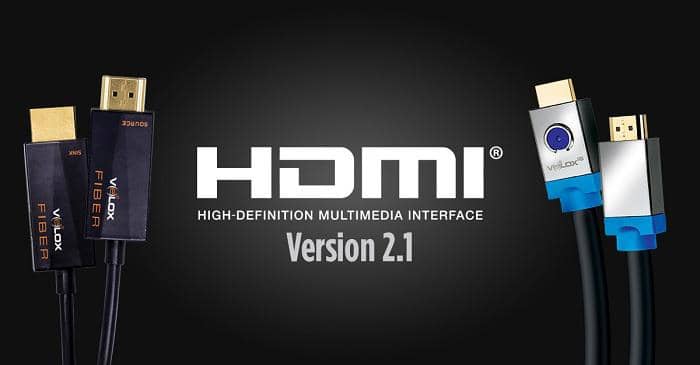
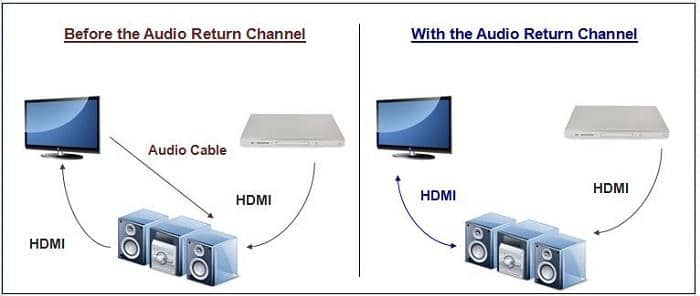
What is eARC? What is HDMI eARC? What is eARC HDMI? Are they technically referring to the same thing? Don’t panic! Here comes the time for the demystification: ARC, standing for Audio Return Channel, is a clever protocol that sits within the HDMI standard to help simplify a complicated AV set-up and reduce the number of cables you need. Although HDMI was launched as early as back in 2002, but it wasn’t until 2009 that the HDMI ARC protocol was added as part of HDMI version 1.4 and has been part of the specification ever since. eARC (also known as Enhanced Audio Return Channel) is the next generation of ARC protocol, a feature implemented in the most recent HDMI 2.1 specification.
Use HDMI ARC or HDMI eARC: When and Why
The truth is if you’re not an audiophile with picky ears regarding sound quality, then you might not care about all those high definition audios available on today’s Blu-ray and UHD Blu-ray movies. But to those who do care about getting the best audio quality, HDMI ARC or HDMI eARC matter a lot. Just picture the scene. You have a set-top box, Xbox One or PS5 and Blu-ray player all plugged into your Smart TV via HDMI. Or perhaps you’re a Netflix or Amazon Prime Video subscriber and you have installed their respective video apps on your TV. Either way, instead using the TV’s inbuilt speakers for audio, you prefer hearing everything played through your top-end soundbar or AMP connected to your home theater system.
Previously under such circumstances, you would have to connect an optical cable from the back of your TV to an optical input on your audio device. But that’s not the best solution because there is a chance you might mess up with those cables. This is when and where HDMI ARC/HDMI eARC kicks in to fix the mess. HDMI ARC/HDMI eARC can save the trouble using an optical cable because it allows you to send audio downstream from a compatible HDMI socket on your TV directly to a compatible HDMI ARC/HDMI eARC socket on a soundbar or AV receiver.
eARC vs ARC: Which HDMI Standard Should I Stick to?
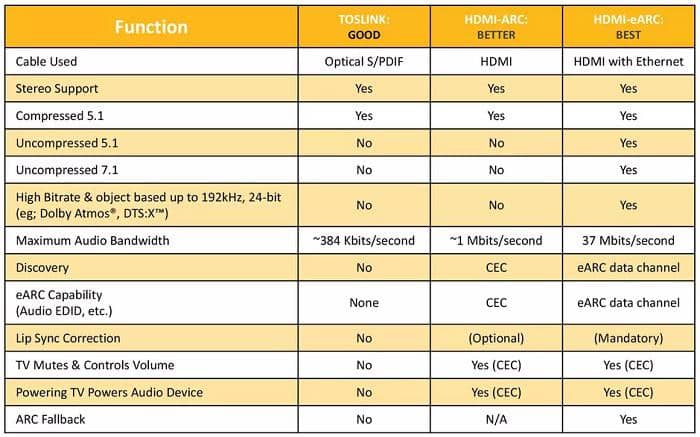
Well, the answer to this question depends on you how much do you want to hear the true HD audios. Here is a comparison table for you to refer to.
Preserving the High-Definition Audios with DVDFab 13
Okay, now you’ve understood almost everything about what is ARC, what is eARC, what is HDMI 2.1 and how you can get the best audio quality out of your HDMI 2.1 TV at home. Then it’s time we talk about how to get you more videos with high-definition audios.
Convert with the Blu-ray and UHD Ripper modules still retaining the HD audio
Apart from the MP4.TrueHD.eARC conversion profile that you can use when converting your Blu-ray and 4K Blu-ray discs with the Blu-ray ripper software and the UHD ripper software, there are also some other conversion profiles capable of retaining the HD audios.
Anyway, let’s go over the detailed guides on how to convert Blu-rays and 4K UHD Blu-rays to digital videos without losing the high-definition audio tracks on the original discs:
Step 1 — Download and Installation
Download and install DVDFab 13 on your computer, no matter you are with a Windows computer or Mac computer. Click either of the two download buttons below to download your matched version.
i Free Download i Free Download
Step 2 — Load your source Blu-ray/4K Blu-ray
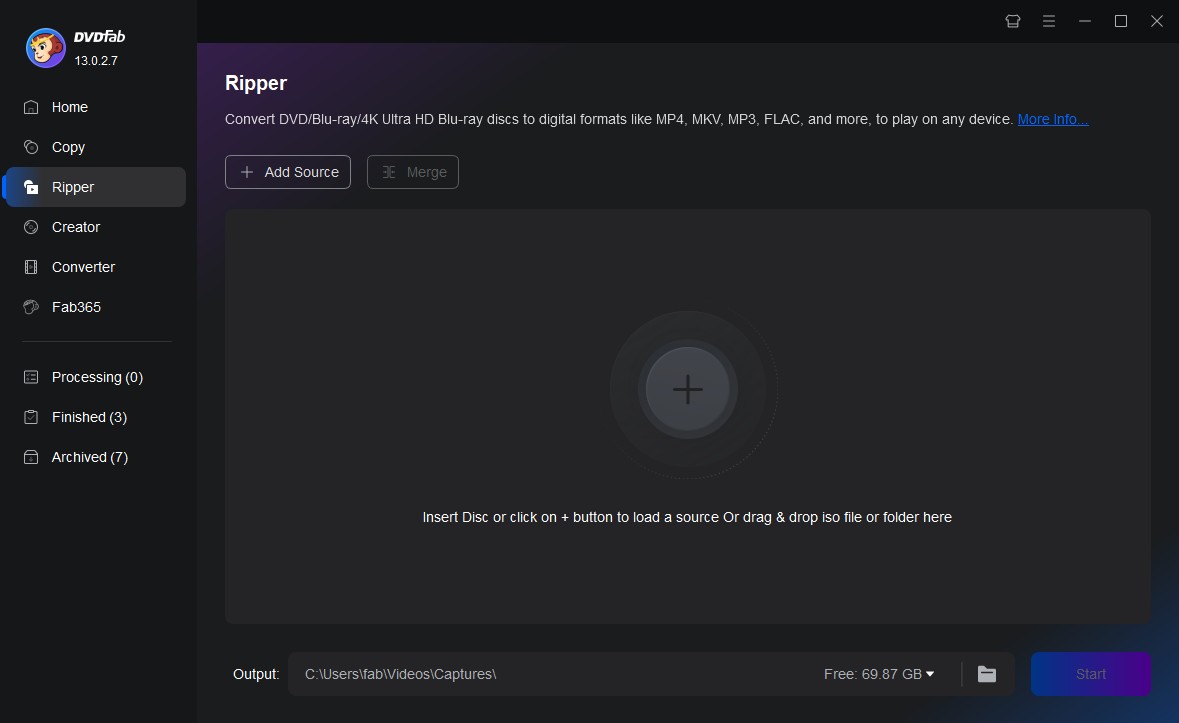
When the installation is over, you can launch DVDFab 13 and opt for the Ripper module through the top menu bar, and then load your target Blu-ray/4K Blu-ray source. If it is a physical disc, the software will automatically load it once you insert the disc into the optical drive. Or you can also add an ISO file or folder from your hard drive, using either of the two add buttons (one at the top left corner, the other at the center) or simply drag & drop it into the main interface.
Step 3 — Choose the HD Audio Capable Conversion Profile
Next, you are supposed to choose a conversion profile from the inbuilt Profile Library. To do that, click the "Choose Other Profile" option from the Profile Selection Box. When you are into the inbuilt Profile Library, move to Format>Video>General, and select the MP4.TrueHD.eARC profile.
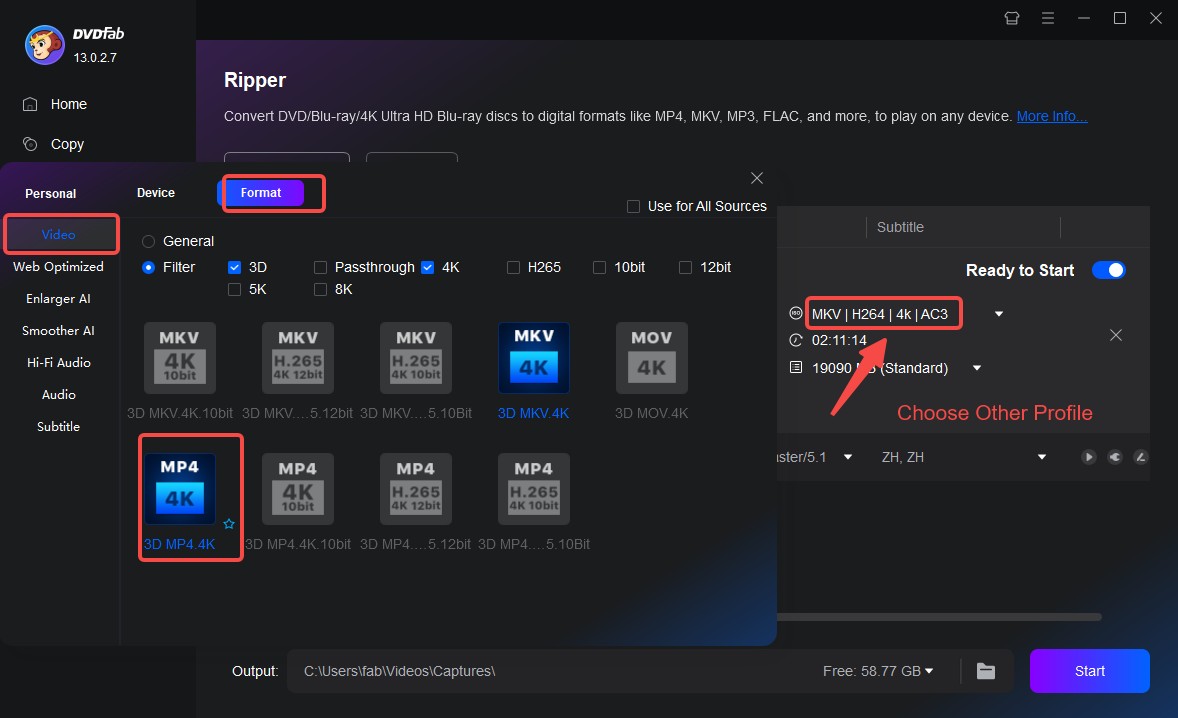
Additional Tips: there are three more conversion profiles that can get you high-definition lossless audios in the converted videos. They are the M2TS.Passthrough, MKV.Passthrough and the 3D.MKV.MVC.Passthrough available at Format>Video>Filter>Passthrough. You can choose either of these if your device support the playback of such videos.
Step 4 — Customize Output Video Parameters as You Wish
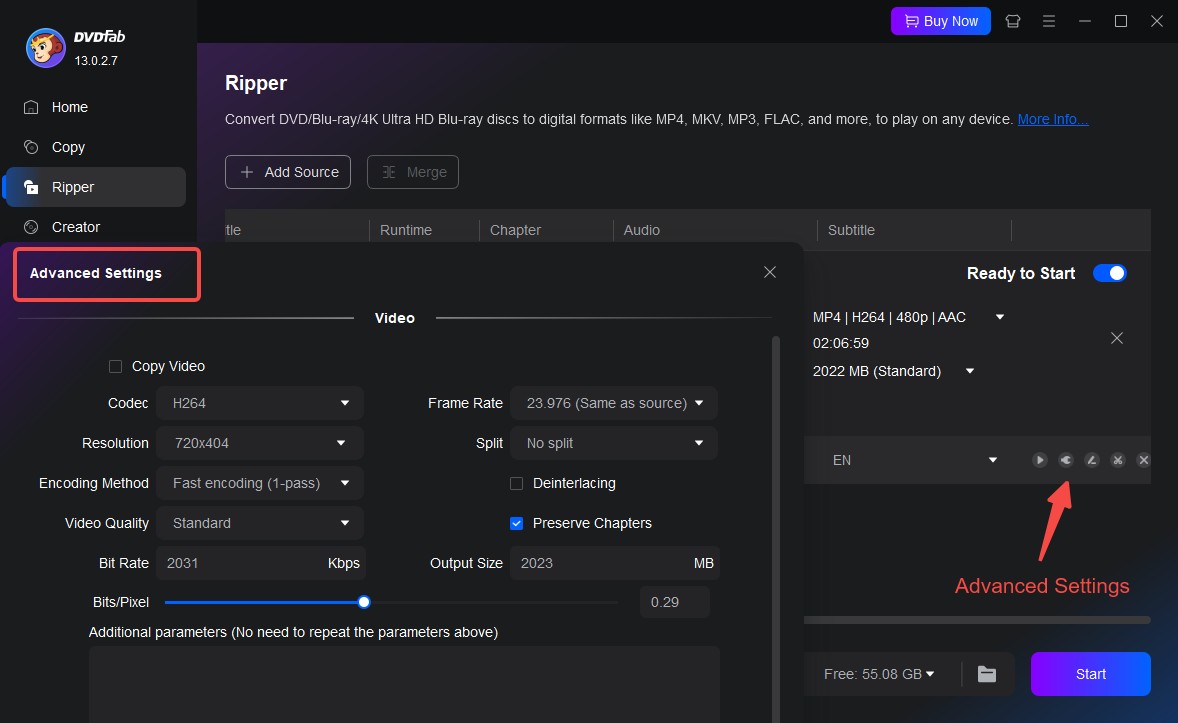
If you want to further customize the video settings to meet your specific need, feel free to click the Wrench icon that shall bring you to the Advanced Settings panel, where you are free to change the values including encoding codec, resolution, encoding method and even the framerate and bitrate.
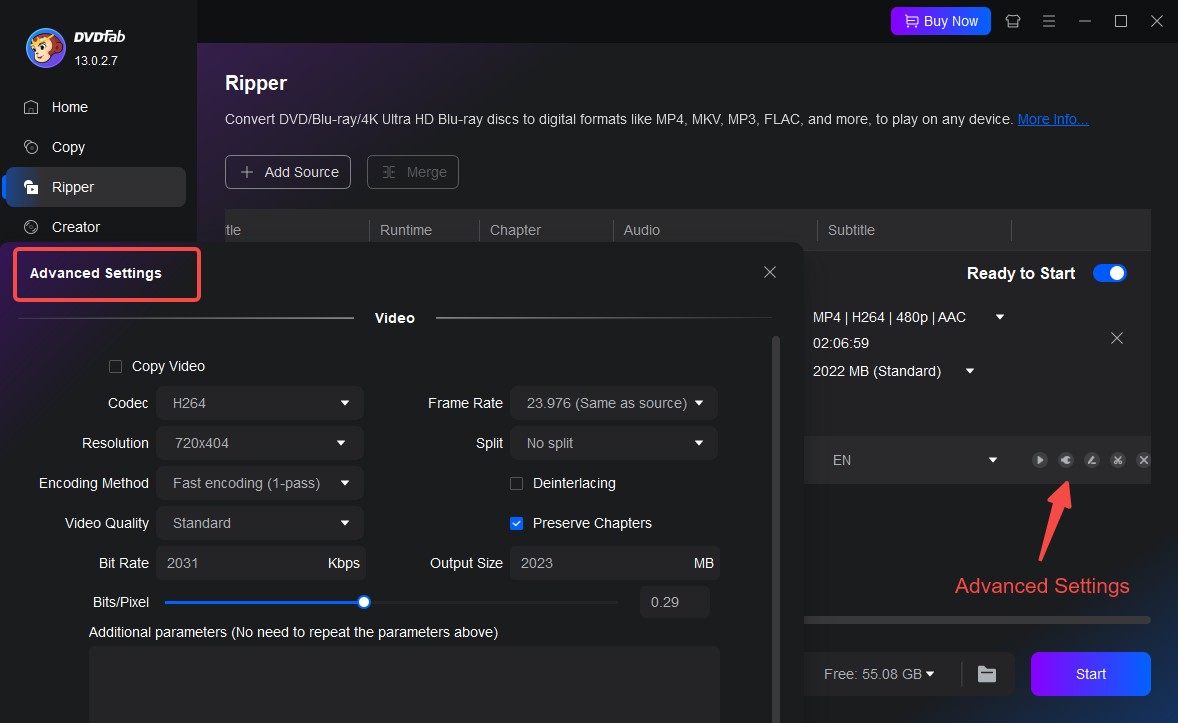
Additional Tips: If you’ve selected one of the three Passthrough conversion profiles, you won’t be able change anything here at the Advanced Settings panel except for the way how you want to deal with the subtitles. Because Passthrough means both lossless video and lossless audio that you can no longer change.
Step 5 — Edit the Output Video as You Want
When you are done at the Advanced Settings panel, if you still feel creative, you can also go to the Vide Edit panel to make your video stand out from the crowd. To do that, click the Brush icon next to the Wrench icon, and you will enter the Video Edit panel, where you can do many interesting editings, such as adding extra texts, watermark and external subtitles, cropping and trimming the video, etc.
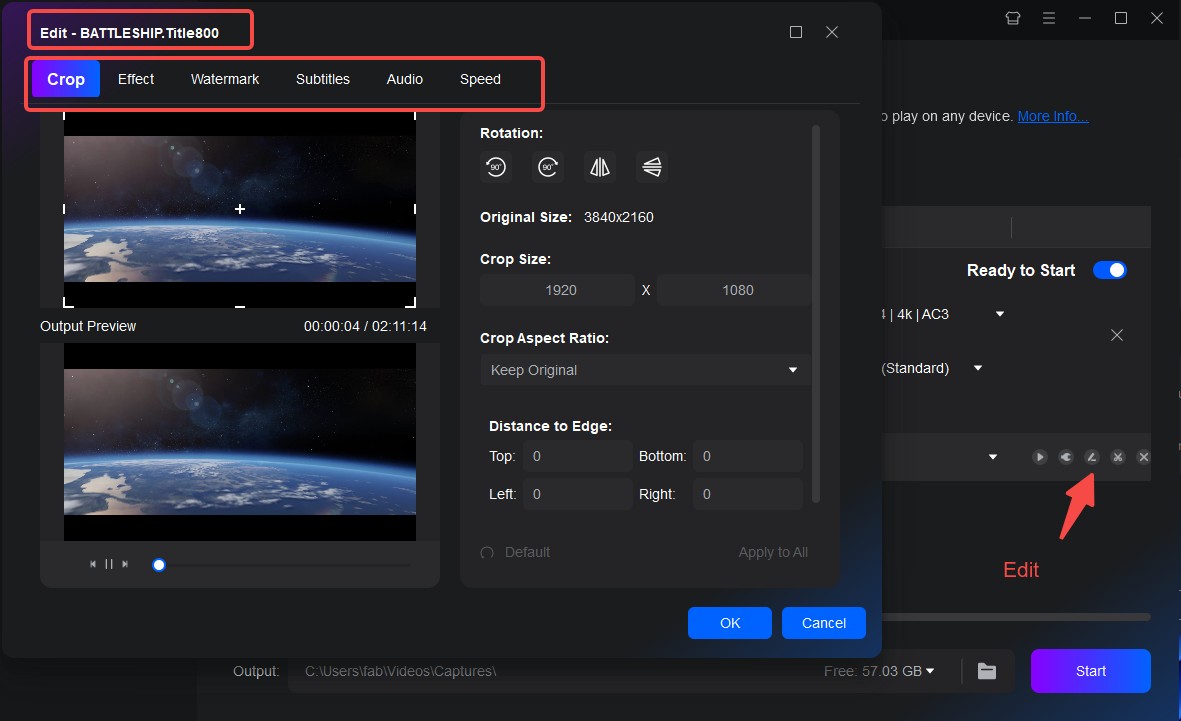
As a sidenote: if you’ve chosen one of the three Passthrough profiles, most of the functions here are also unavailable.
Step 6 — Start the Conversion
When everything is ready. Just hit the Start button at the bottom right corner of the main interface to trigger the conversion process and wait for the conversion to complete, which shall take a while even with the GPU hardware acceleration activated.
Copy with the Blu-ray and UHD Copy modules to retain the HD audio
Besides converting to MP4, MKV and M2TS videos, there are still other ways that you can explore to preserve the high-definition audios with DVDFab 13. With the Blu-ray ropy and UHD copy modules, you can make lossless backup copies to your Blu-rays and 4K Blu-rays and that can also achieve the goal of preserving the high-definition audios.
i Free Download i Free Download
To be specific, if you want to use the lossless backup function, you should go with the Clone, Full Disc or Main Movie backup modes. But no matter which mode you choose, remember to choose BD50 as the output size so that no compression shall be involved.
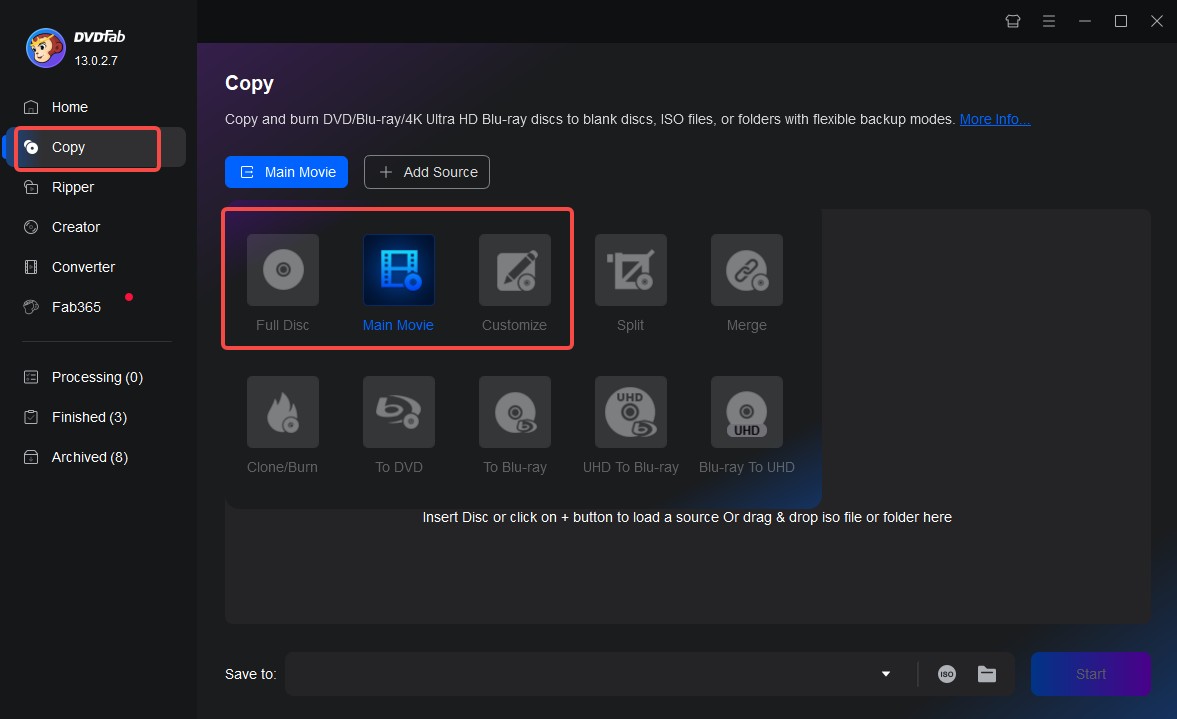
Alright! Above are the detailed information on how to convert Blu-rays and 4K UHD Blu-rays to MP4 videos or make lossless backup copies with high-definition audio tracks to enjoy on your cutting-edge home theater system. Hope you have much fun enjoying the best video and sound effect. If you happen to be in need of a 4K media player software on your HTPC, then DVDFab Player 6 is your No. 1 option.
Final Words
In this article, we’ve briefed you on what is eARC, what is HDMI 2.1, what you need to take advantage of HDMI 2.1, alongside with the different means you can use to get high-definition audios to play back on your top-class home theater system. In case you are still interested in getting more 4K videos out of your regular 1080p Blu-rays, feel welcome to check out our featured article on how to upscale 1080p videos to amazing 4K quality.
