Guide on How to Use Handbrake
Summary: Handbrake is a handy software that is available as an open-source for the users. It can be used for a variety of purposes. With this Handbrake - How to use guide you will be able to use it for batch conversion, ripping DVDs, etc. So, let us get started with our How to use Handbrake guide to get you sorted.
Handbrake is a perfect tool that can be used for the conversion of video from any format and you can also select a variety of modern and widely supported Codecs on this software. It was developed in the year 2003 by Eric Petit and was used for ripping DVD to USB or device that could store data. air this software can be used for hardware acceleration, transcoding, batch conversion, and converting an ISO image on a DVD or any other storage device which can also be a video_ts folder. now that you have got the information about it was fabulous software let's move ahead with Handbrake how to use guide and find out what more it can do.
How to use Handbrake to Convert Videos?
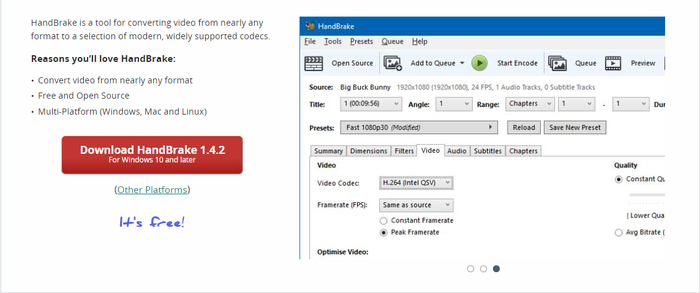
What is Handbrake? Handbrake can be used for the conversion of videos from any kind of format and is an open and free source it can also work as a multi-platform software that can work on Linux, Mac, and Windows as well. But, there is a lot more than Handbrake can do, so let's find out how to use Handbrake in different situations to ease you with your work.
How to Use Handbrake to Convert Videos on Windows
If you are looking for a way to use handbrake on Windows and Mac and thinking about How to use Handbrake as a video converter then you can use the following set of steps for the purpose.
Step 1: Selecting a video source
First of all, the user has to complete the downloading and installing process of handbrake for Windows and after launching it click on the source button given at the top. As soon as the user clicks on the source button they will find the following options:
- File: It will be used as an option for the conversion of a video file to any format.
- Folder: Under this option, the user needs to select a Blu-ray or DVD, video_ts folder on their desirable hard disk.
Now the user needs to go for the selection of a source and as soon as it is imported they need to go on a list of titles on the source and then proceed with the selection of that particular video that they wish to encode.
Step 2: Making the settings for output
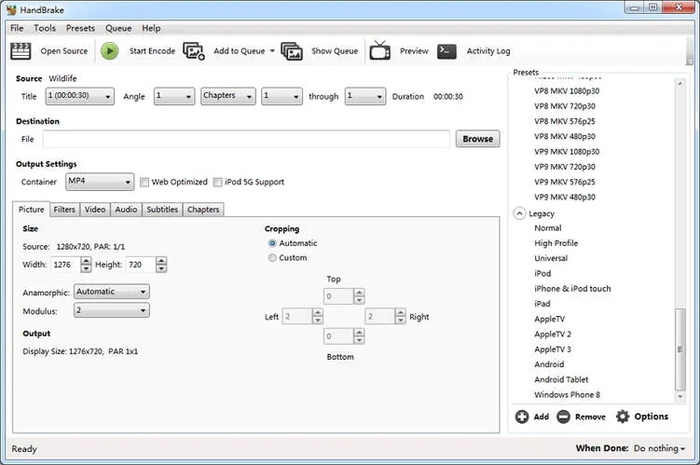
In this step, you need to select the destination for output and you need to click on the browse button and need to choose a folder on your desirable hard disk.
After this, you need to proceed with choosing a preset from the given preset list on the right side and if you wish to customize the parameters you can N2 use the closest preset and then continue with changing from there. From "normal", "high profile" and "universal" presets u may choose any as per your requirement.
Step 3: Conversion
After all the steps are completed you need to go for the final step of conversion. For this, you need to click on the button with start and code and this will start the conversion process from one format to another. In case you wish to convert more than one video then you need to click on the add to queue button and the “show queue” dialog will appear and your job is done.
How to Use Handbrake to Convert Videos on Mac
Step 1: Download HandBrake macOS Version and Get It Installed on macOS
Download open-source HandBrake offcially, where you can select different version of your computer, like Download HandBrake for Mac OS X 10.6-10.15 for 64 bit Intel, Windows Vista-10 for both 64 bit and 32 bit etc. Check to see if your Mac has the system requirements; click on the Apple icon in the top left corner and About this Mac. Then install HandBrake.
Step 2: Change the HandBrake Output Settings
You can right click Source button you import your DVD or video file. And the loaded file information can be checked at HandBrake Mac version Source section.
In the Destination section you can set the output folder by clicking Browse button.
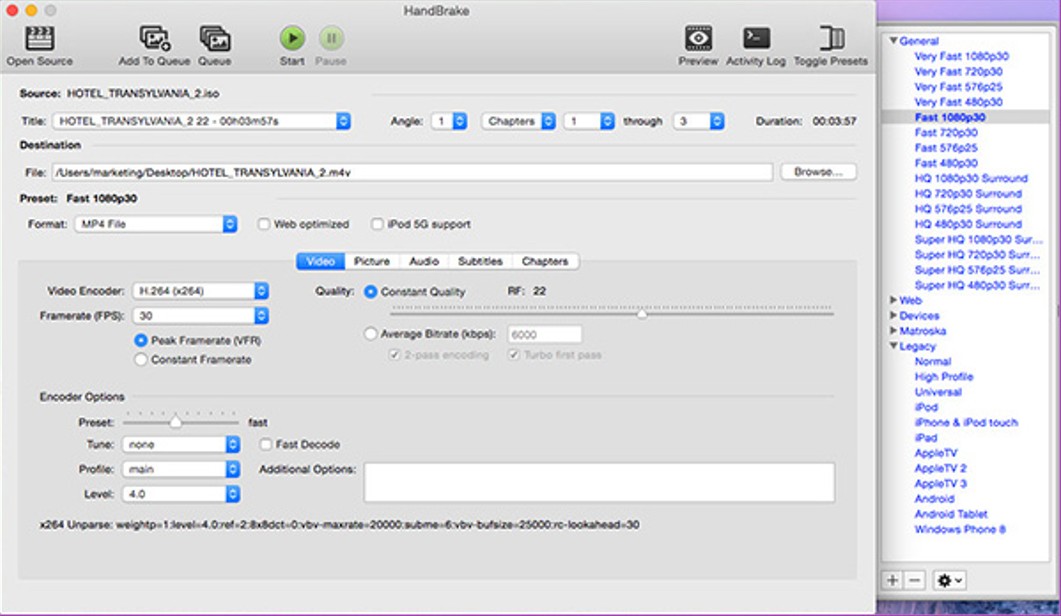
One of the first things you need to decide is what format (MP4, MKV,AVI, OGM) Output setting section also has 3 options you can choose: Large File Size, Web optimized and iPod 5G support.
Step 3: Choose the HandBrake Video Settings
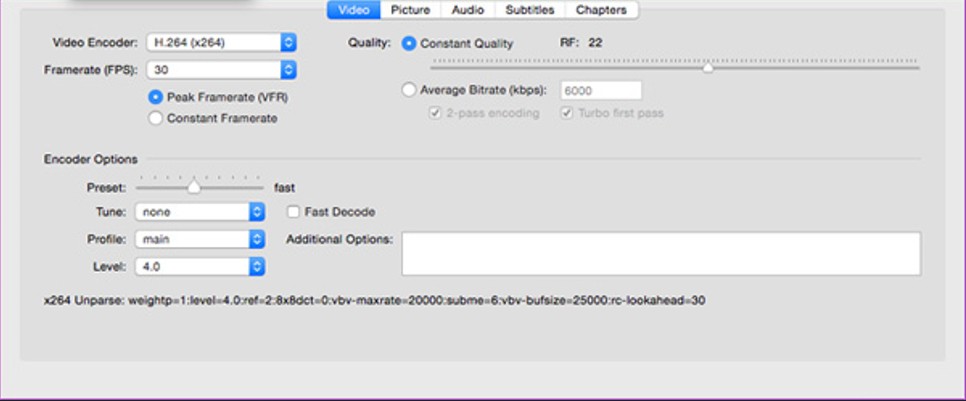
- Framerate(FPS): Select a frame rate that you prefer. If you want to maintain the original framerate of the source video, select the "Same as source" or "Variable Framerate (VFR)" option in HandBrake. This ensures that the converted video retains the same smoothness and timing as the original. If you prefer a consistent framerate throughout the converted video, choose the "Constant Framerate (CFR)" option in HandBrake. This is useful when compatibility or playback issues may arise with variable framerates, especially on certain devices or video players.
- Quality: There are three options available: Specify an output size and the quality will depend on the specified output size; Select a birate. The higher bitrate you choose, the bigger size the output file will be, and the better quality you will get; Directly select a quality.
- Encoder: Select the encoder you prefer. X264 is the default video encoder in HandBrake and is widely considered to be one of the best H.264 encoders available. It offers a good balance between video quality and file size. x264 is suitable for most situations and provides excellent compression efficiency.
- 2-pass encoding (optional): This takes twice as long to encode, but it improves the video quality and doesn't make the file any larger.
Step 4: Convert Videos on Mac Computer
Click on the Start button on the left top of Mac version HandBrake. The encoding time will depend on several variables including: the duration of the video file, the speed of your Mac computer. What other activity your computer is currently doing, the codec you selected (H264 Intel QSV or others) and if you decided to do a 2-pass encoding or not.
How to Use Handbrake to Rip DVDs
HandBrake itself can't rip commercially copy-protected DVDs. If you want to use HandBrake to rip encrypted DVDs (actually, almost all store-bought DVDs are copyright-protected), you should firstly download libdvdcss. libdvdcss is a part of VideoLAN project capable of reading and decrypting DVDs locked by region codes 1, 2, 3, 4, 5, 6 and CSS.
How to Use Handbrake to rip DVD on Windows
Prerequisition: Download Libdvdcss to Rip Protected DVDs
Step 1: Download libdvdcss-2.dll for Handbrake on Windows
Libdvdcss is part of the VideoLAN project. The latest version of libdvdcss is 1.4.3, and users can download and install libdvdcss-2.dll on Windows 11/10/Mac from VideoLAN official site.
Step 2: Get the Libdvdcss-2.dll
You will get a file named libdvdcss-2.dll. You don't have to rename libdvdcss-2.dll as libdvdcss.dll. Just cut and paste the downloaded libdvdcss 2 file into your HandBrake program folder. If you didn't manually set the installation path before, it normally is "C:\Program Files\HandBrake".
Step 3. Install the Libdvdcss
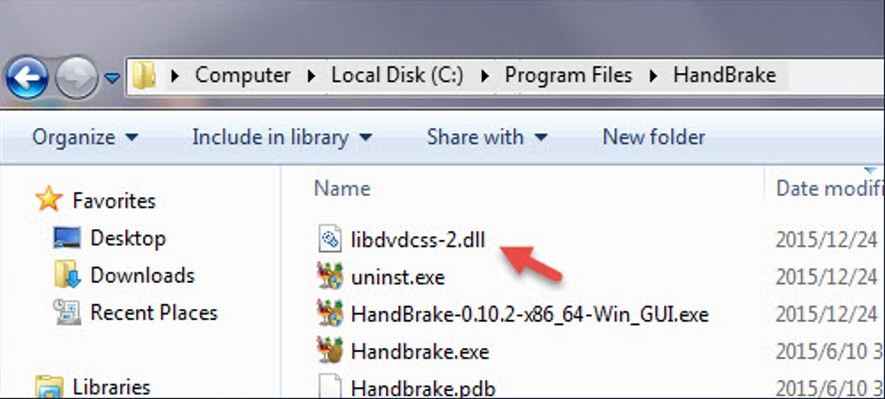
When you open a protected DVD next time, libdvdcss-2.dll will work with Handbrake automatically to remove the copy protection and load the correct DVD data.
Detailed Steps of Ripping DVDs on Windows
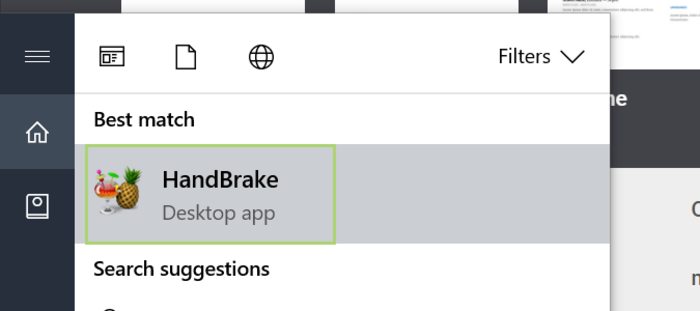
Step 1: Download and install handbrake DVD Ripper
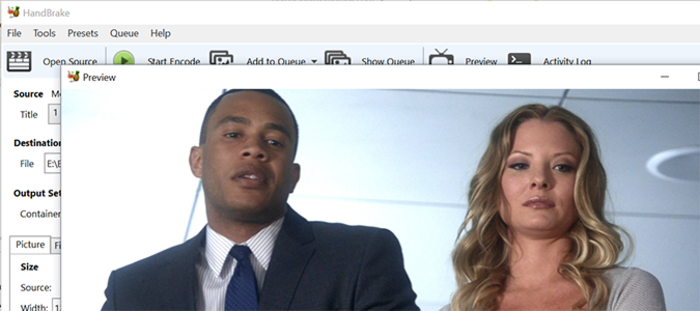
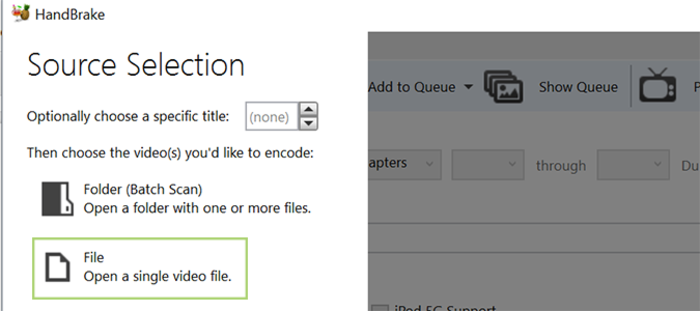
After downloading and installing the Handbrake DVD Ripper on your Windows PC e you need to follow the exact directions which will be available on your screen and then you need to proceed with the selection of sources which is given on the left-hand side of the window. the software can open Blu-ray discs, DVDs, Video_TS, ISO images, and BDMV directly.
Step 2: Scanning
Now handbrake will be able to scan your DVD titles and without taking much time it will rip the given DVD easily. If you are trying to encrypt Any DVD with several titles it may take a few more minutes to do the same. as soon as handbrake scans them one by one and finishes you need to click on the dropdown menu of the title and proceed with the selection of a written title for being copied.
Step 3: Choosing the right preset
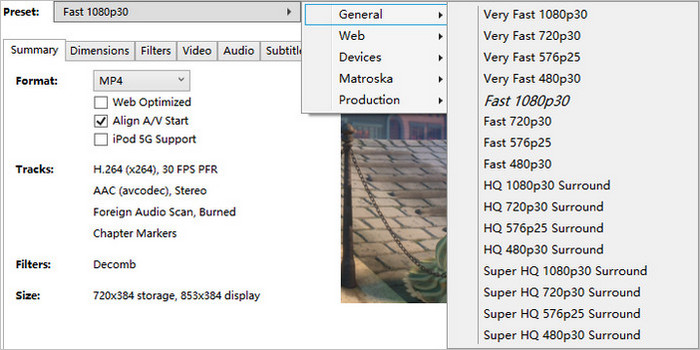
Now you need to click on the dropdown menu of the preset and select the right preset from the list which mentions a lot of settings for devices, web, software, etc. Normally there are general presets mentioned in the software that makes use of MP4 format which is a widely accepted format and known for its quality and speed for conversion.
Note: Handbrake is not compatible to rip DVDs to the Video_TS folder and ISO images.
Step 4: Adjustment of video
Now you can do some adjustments to the video, subtitles, and audio mentioned under the presets menu. There are a few default settings that provide usability and good quality to the users. In case your DVD is having several audio tracks you can easily select your preferred one as per your requirement.
Step 5: Selecting the output
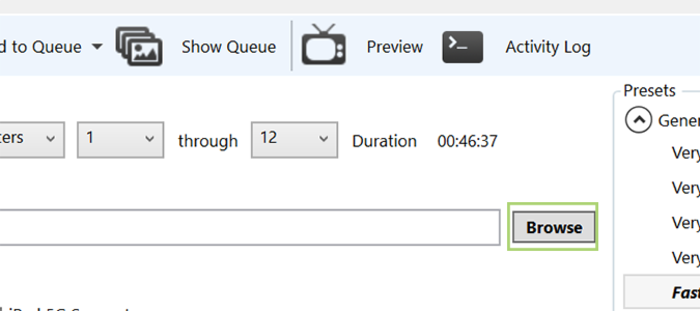
Now you need to specify the output to copy files. Herein you can click on the browse button which is present at the bottom of the window and proceed with specifying the directory where you need your output to be stored.
Step 6: Completing the process
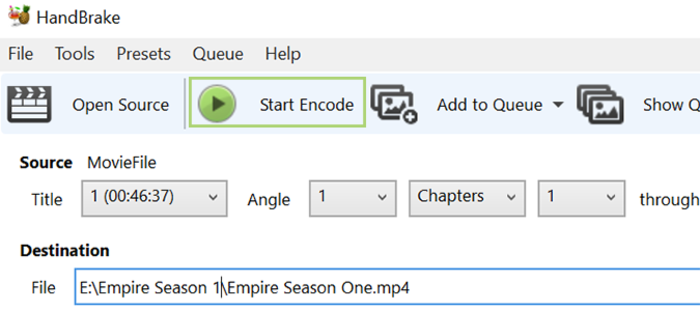
In case you wish to copy more than one title in a single go then you need to click on the ‘add to queue’ tab which is given on the toolbar alternatively you can also click on the start and code button and this will start the process of ripping DVDs.
How to Use Handbrake to rip DVD on Mac
Prerequisition: Download Libdvdcss to Rip Protected DVDs
Step 1: Download libdvdcss.pkg for Handbrake on Mac OS.
Step 2: Double-click the downloaded libdvdcss installer package file to install libdvdcss on Mac.
Step 3:Basic Settings
There is one more step for installing libdvdcss on Mac El Capitan and later macOS as its SIP (System Integrity Protection) will remove libdvdcss by default. To download libdvdcss on Mac later than El Capitan successfully, here are two workarounds:
Option 1. disable SIP. To disable SIP for libdvdcss Handbrake download on Mac, you need to: restart your Mac and simultaneously press down the Command - R keys until you see the Apple logo. Select Utilities > Terminal. Run the command "csrutil disable" in the Terminal and press Return. Exit Terminal and click the Apple menu > Restart to reboot your Mac. Then you should be able to install libdvdcss for Handbrake on Mac without problems.
Option 2. a more complicated but recommended way from a Reddit user (as below).
1. Open a Finder window -> type "cmd+shift+G" or click "Go" and choose "Go to Folder" -> copy and paste /Library/SystemMigration/History/ -> press button "GO" -> open the folder "Migration-[random letters and numbers]" and find "QuarantineRoot" -> libdvdcss file should be in this folder.

2. Again click "Go" on the taskbar -> "Go to Folder" -> type "/usr/local/lib".
3. Cut and paste the libdvdcss file (libdvdcss.2.dylib) to the folder "/usr/local/lib" -> put in your admin password to finish the move and then libdvdcss is installed on Mac for Handbrake.
Detailed Steps of Ripping DVDs on Mac
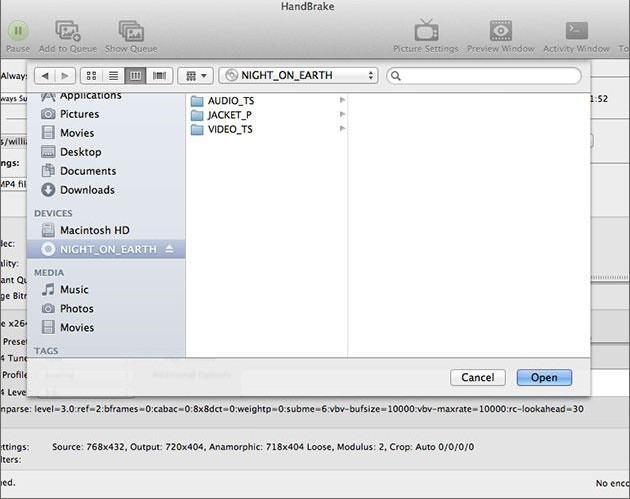
Step 1. Open the source DVD with HandBrake.
Launch HandBrake and then it will open a dialog box asking you to select source file. Now, you should browse you Mac and select the DVD you want to rip as the source.
It will take a while for HandBrake to scan the titles on your DVD.
Step 2. Select the DVD title to rip.
Click on the box next to Title to choose the DVD title you want to rip.
If you don't want to rip the whole title, you can also specify the range by setting starting and ending chapters, seconds or frames.

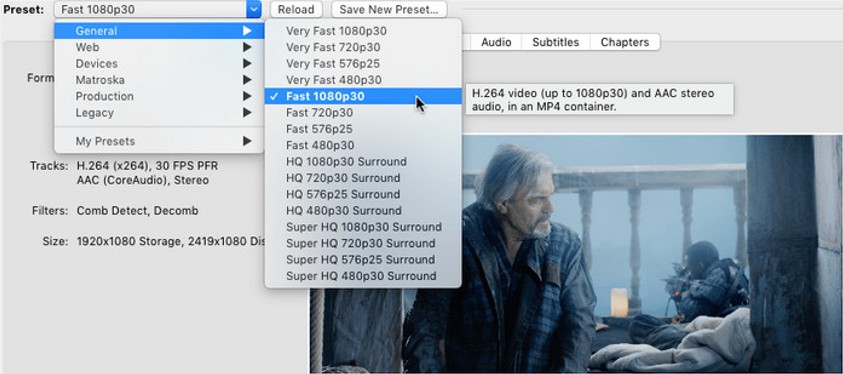
Step 3. Select preset.
Click on the box next to Preset to choose the output format.
After that, you can click the Summary, Dimensions, Filters, Video, Audio, Subtitles, and Chapters tab to adjust settings futher.
Step 4. Specify file name and location.
Enter a desired file name for the DVD rip file into the box next to Save As and click the Browse … button to select the location where the DVD rip file be saved.
![]()
Step 5. Start ripping DVD with HandBrake on Mac.
When you have done all settings, click the Start button which looks like a green play button on the toolbar. Then, HandBrake will start ripping DVD on your Mac.
How to use Handbrake for Batch Conversion?
Step 1: Configuration of the output directory
After downloading and installing your Handbrake software you need to change the preferences of the program. For the very first time if you are trying to run a batch conversion of files you may receive a small error where the user needs to set a folder for saving their queue files.
Now the user needs to click on the "Tools" and then go to the "options" to open the section of preferences. Here you will be able to click on "output files" and then click on the "browse" button which is available next to the default path.
Now you will be able to select the folder where you wish to save your output files. As soon as you have decided where to save your videos you need to click the "select folder" option and your job is done.
Step 2: Adding the desired videos to a Queue
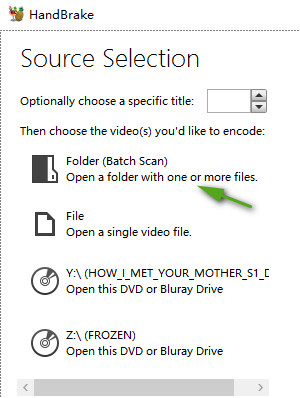
Now you need to select your videos from several locations and add them to the queue one by one. Natively you can select a folder through file explorer where you will be able to browse the location where the source videos are stored. Here you can click on "select folder". After your folder is selected, from the precepts option you need to click on the “the iPhone and iPad Touch” option or any other option of your choice and adjust the settings of output.
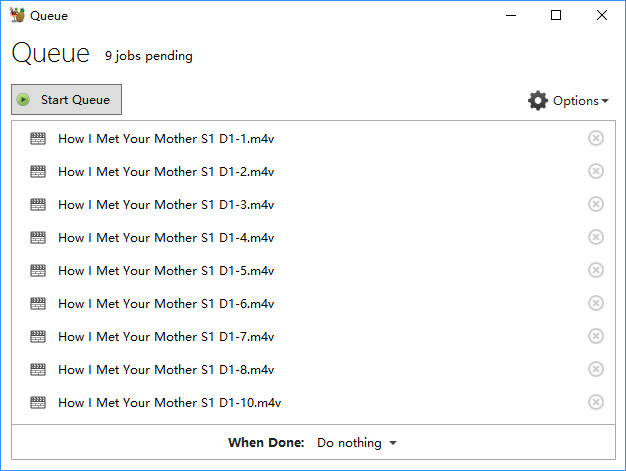
Now you need to click on the "Add to queue" option and select "Add all". As soon as you are done you will notice that your files are adding up to the queue. This helps you in conditions where you wish to convert a good number of files in a single go. The Queue also offers a lot of options which you can choose as per your preference.
Best Alternative to Handbrake
Handbrake is a good software but sometimes you may face bad quality in output video with it accompanied with scrambled video, pixilated results, and crackling sound. Moreover, sometimes it may make the video or audio out of sync.
If you are looking for the best alternative to Handbrake we have got a fabulous substitute for you. DVDFab All in one software has all that is lacking in Handbrake and also provides a lot of multiple features. Let us get an insight into what it can do for you.
DVDFab All-In-One
DVDFab All-In-One comes with a flat design with a light-colored theme and main function types available in the animated version. With this effective software, you will be able to clone or burn your DVD along with splitting and merging it. You can also customize it as per your preference. You can copy or convert a Blu-ray to a DVD format or vice-versa as per your convenience.
Features
- It has an enlarger AI that helps in the enhancement of video quality.
- Available for multiple devices such as Windows and MAC.
- Helps in copying, ripping, and burning DVDs.
- Assists in the conversion of DVDs along with Blu-rays and also works with 4K ultra HD blu-rays.
- Assists in working at a top speed and helps in exporting files without any loss in quality.
Pros
- 30 days money-back guarantee.
- There is dedicated customer service that helps the user in multiple ways.
- Comes with a variety of options as copying, ripping, etc. in the case of a DVD.
Con
- No cons are available.
Steps to convert video with this software:
Step 1: As soon as you start the software you can go to its converter option and then on the left panel you need to click on the icon of profile in which AVI will be mentioned. then you need to open a profile library and go to the device option and you will be able to see the variety of supported mobiles. here you need to navigate through them and then choose anyone as per your preference.
Step 2: Now you need to click on the add button or you can also drag and drop the video file into the software for loading the source.
Step 3: As soon as you have completed the previous step you can change the audio tracks along with subtitles and also make use of the preview option with its fabulous settings in real-time. On the left side of the interface, you will be able to find the profile I can where you will be able to see the source info. Now you need to click on the advanced settings button and Virtually set all the audio and video parameters like frame rate, resolution, codec, and many more.
after clicking on the edit button you will be able to see a video edit window where you will be able to trim and crop the video and add any kind of watermark to it along with external subtitles.
Step 4: Now you need to click on the start button which is given on the main interface and this will start your conversion. When the process gets started you will be able to see detailed info of the progress in real-time and you can set your PC either to automatic shutdown or you can exit the program as well.
FAQs
What is the best alternative to Handbrake?
DVDFab All in One is the best alternative to Handbrake.
ACan I use Handbrake on Windows 10 and Mac devices?
Yes, Handbrake is open-source software that can be used on Windows 10 and Mac devices.
ACan I use DVDFab all in one for free?
Yes, you can make use of DVDFab all in one software for 30 days as a trial version.
AConclusion
We hope that we were able to answer all your queries about How to use Handbrake on Windows 10, how to use Handbrake to rip DVDs, etc. with our Handbrake how to use guide. There are detailed steps for all your queries of How to use a Handbrake. Alternatively, we have suggested a better option if you find Handbrake inefficient in pulling out a task. DVDFab All in One is an efficient software that can be used in place of Handbrake and you will never be disappointed.


