How to Rip DVDs to iTunes for Free: 3 Methods & Guide
Summary: Being an Apple user, it's an added advantage to enjoy your entire DVDs collection on your iPhone or Mac anytime by following the methods of how to rip DVDs to iTunes.
Table of Contents
iTunes is one of the most advanced multimedia management, organizing, and streaming utility apps compatible with Mac and Windows OS. In addition to purchasing, downloading, streaming, and organizing multimedia content, iTunes lets you rip and digitize DVDs on your Windows and Mac. So, it's time to learn the top three methods of putting DVDs onto iTunes.
While selecting methods of putting DVDs onto iTunes, you need maximum flexibility in customization. Therefore, here are the tried and tested the top tools to rip DVD for iTunes.
How to Rip DVDs to iTunes with DVDFab DVD Ripper
To rip DVD to iTunes, DVDFab DVD Ripper is an all-rounder program with ultimate customizations, such as format selection, multiple filters, audio-video quality, etc. While ripping DVDs, it can also convert Blu-ray to iTunes with an advanced copy-protection removal option.
Now, to import DVD to iTunes on Mac or iPhone, the DVDFab DVD Ripper offers two dedicated methods, and you must choose the best-suited one depending on your requirements.
Method 1: Transfer to iPhone or Mac by selecting the device
Step 1: To know how to transfer DVDs to iTunes by selecting the iPhone or Mac device option, you must launch the DVDFab 13 version on your Windows or Mac system > Select the “Ripper” module. Then, insert a physical DVD into your system's optical drive. The DVDFab program will automatically recognize and load it.
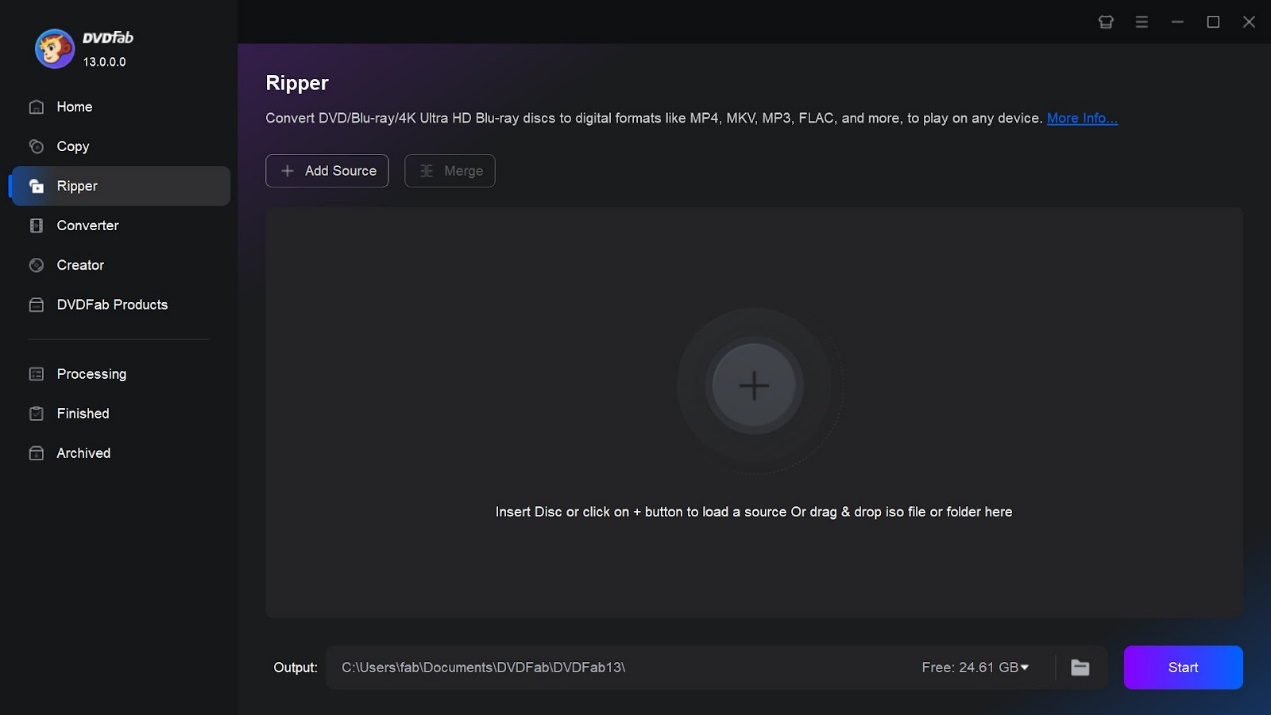
Step 2: Once the loading is complete, start customizing the output profile, depending on your choice. You can rip the entire DVD or any part of it by selecting the “Choose Other titles” option. For customization, you can also select audio tracks, subtitles, chapters, add external subtitles, etc.
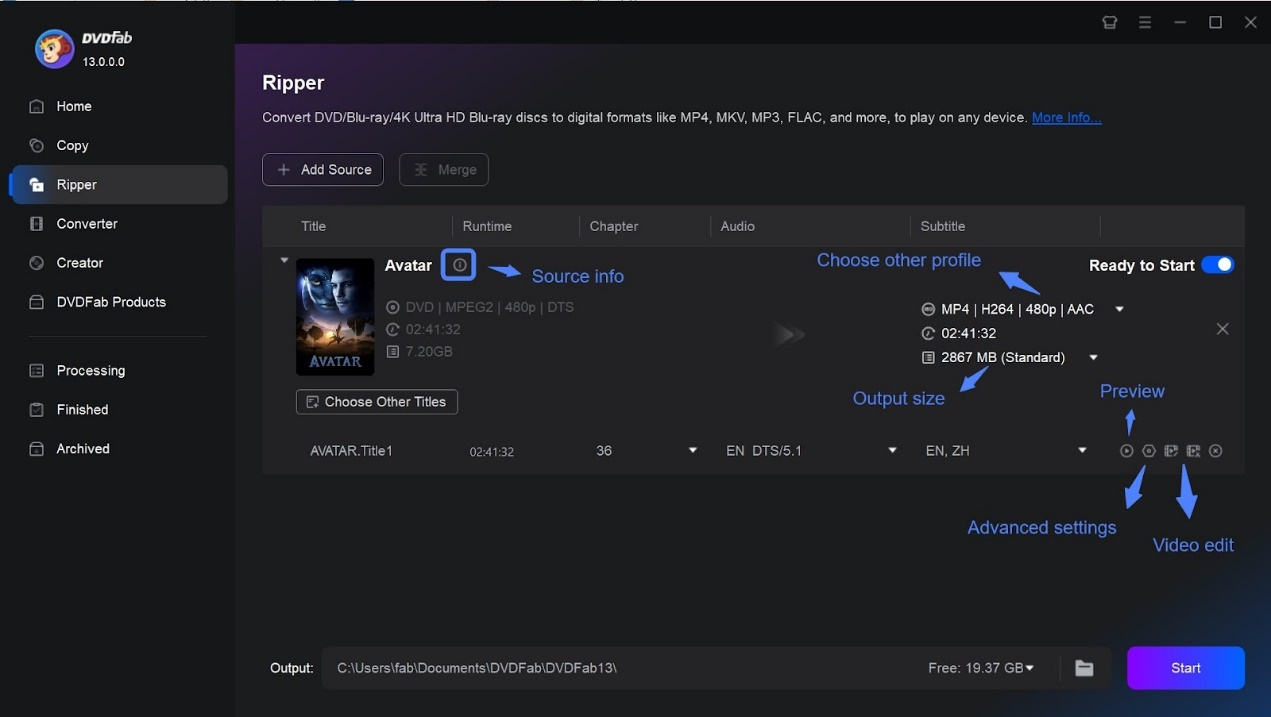
Step 3: To go to the Profile library, you need to select the “Choose Other Profile” option. Then select the “Device” or “Apple” option to locate your desired iPhone or Mac option as the output profile. This tool supports ripping DVDs to multiple versions of iPhone or Mac.
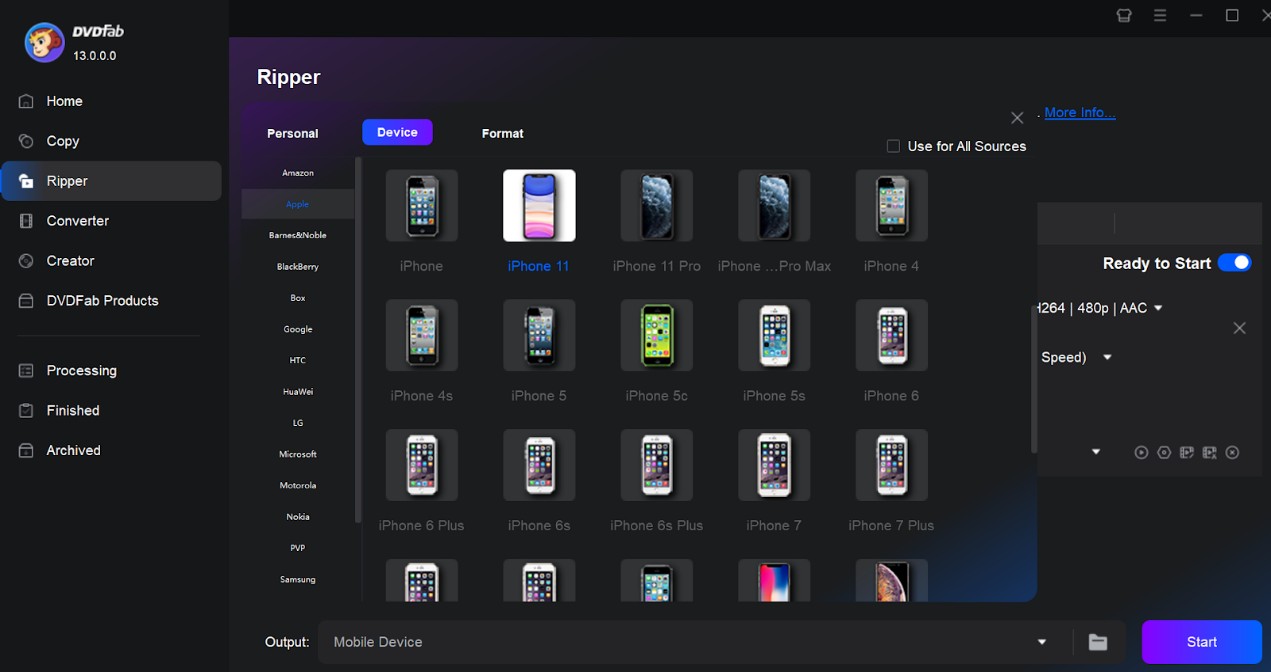
Step 4: Select “Advanced Settings” to customize various audio-video parameters as output profiles. Select output quality as your requirements. For video editing requirements of the output profile, head to the built-in “Video Editor” section to explore various trimming, cutting, cropping, and saturation adjustment functions.
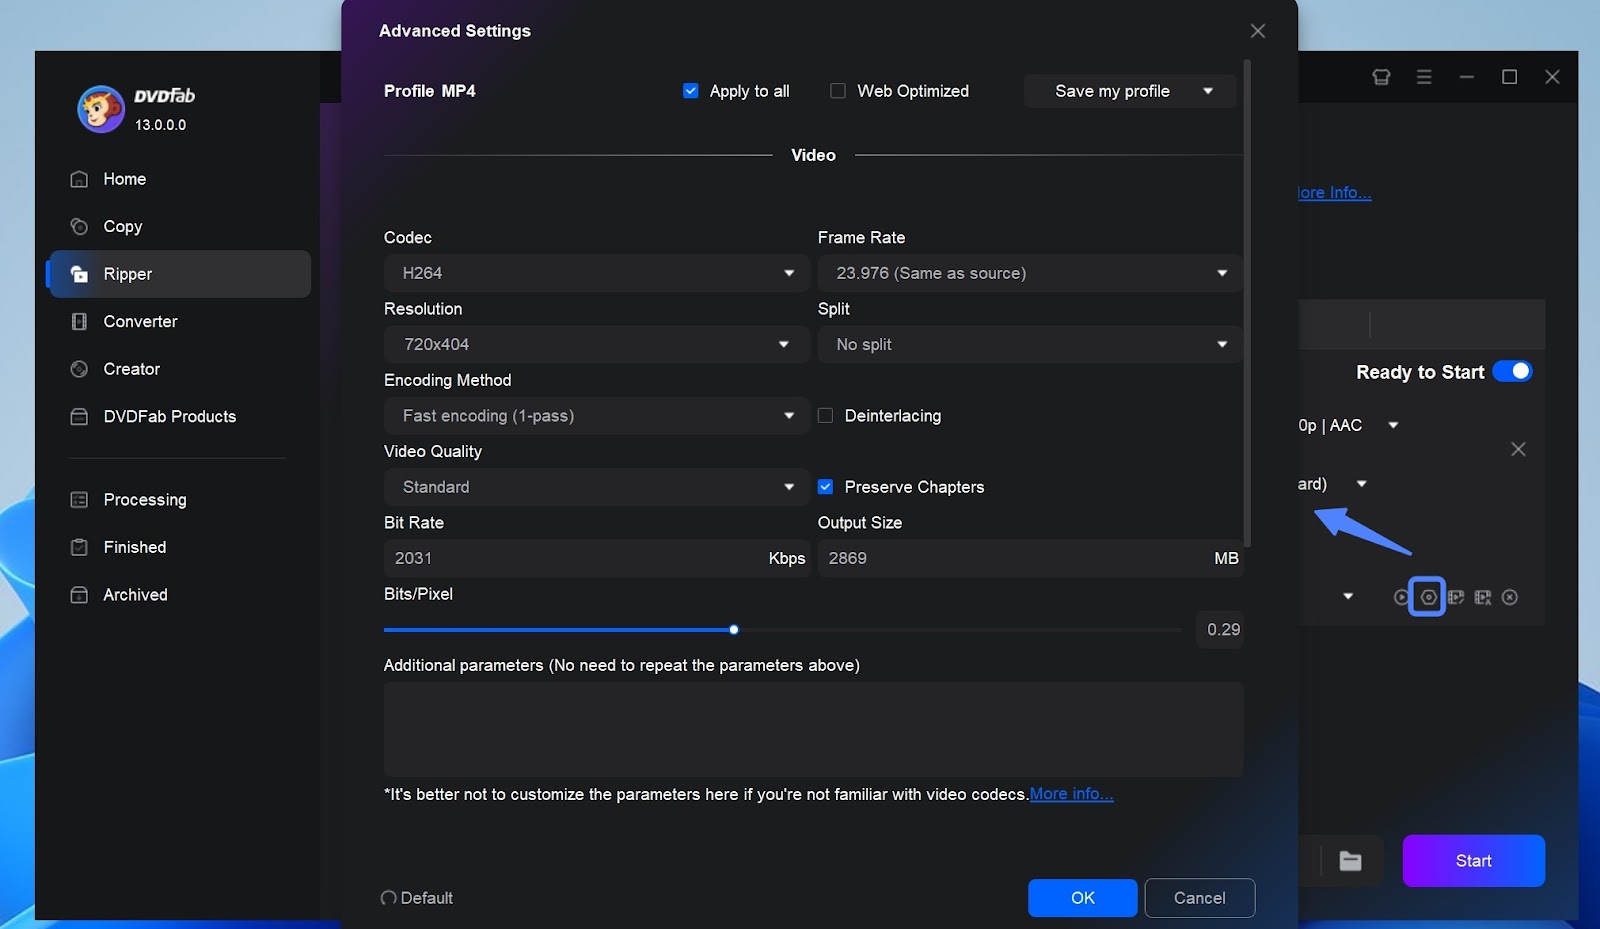
Step 5: Next, select the output directory option. You can save the ripped DVD to your system's hard drive or mobile device. Once done, select the “Start” option to convert the DVD to an iPhone or Mac, depending on what device you have selected before for the lightning-speed conversion.
Method 2: Choose an iTunes Compatible Format
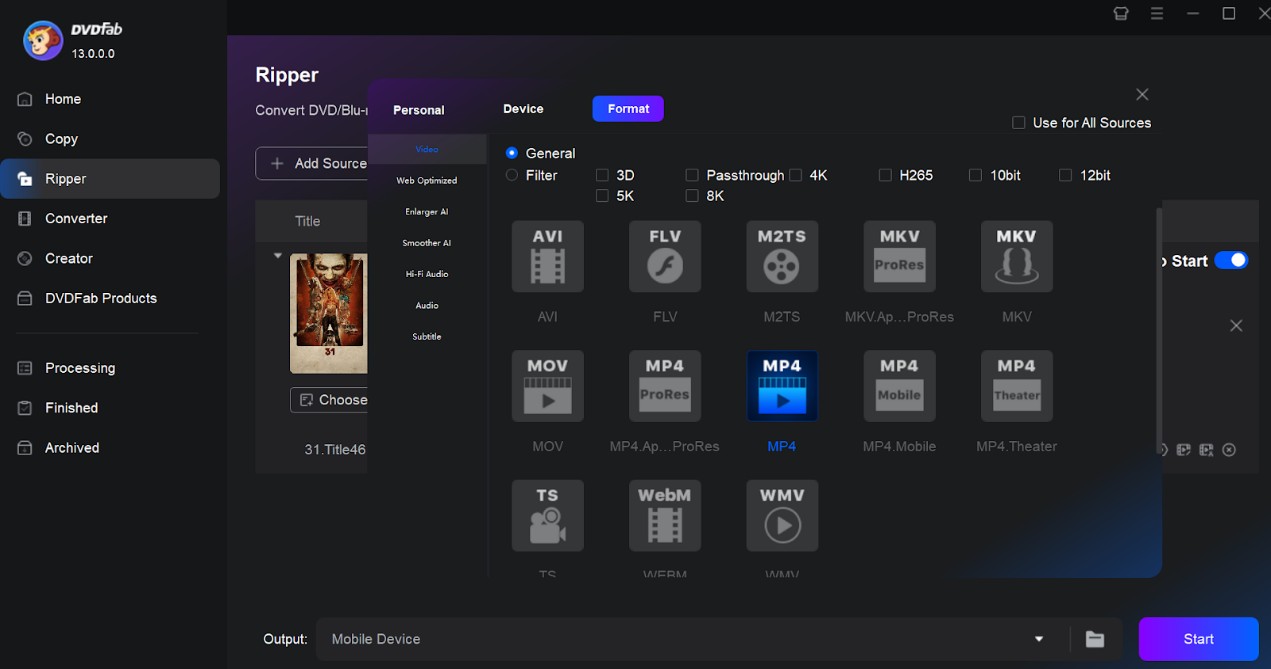
Step: In this method, you have to follow the Method 1 steps from the beginning till to the “Choose Other Profile” library option. After that, instead of selecting the “Device” or “Apple” option, you need to select the “Format” or “Video” option to rip DVD to MP4 or any other format that is supported by your iPhone or Mac device. After that, you must follow the same steps of Method 1 from “Advanced Settings” customization until the end.
How to Import DVD to iTunes on PC for free
To import DVDs to iTunes to Mac or PC, you need to convert your desired DVD to the iTunes-supported format on your Windows or Mac system, such as MOV, Mp4, M4V, etc. As you have already done these steps using the above-mentioned steps, it's time to know how to rip a DVD to iTunes. To do this, you need the latest version of iTunes 12.10, an iTunes account, and internet access if required.
On Windows
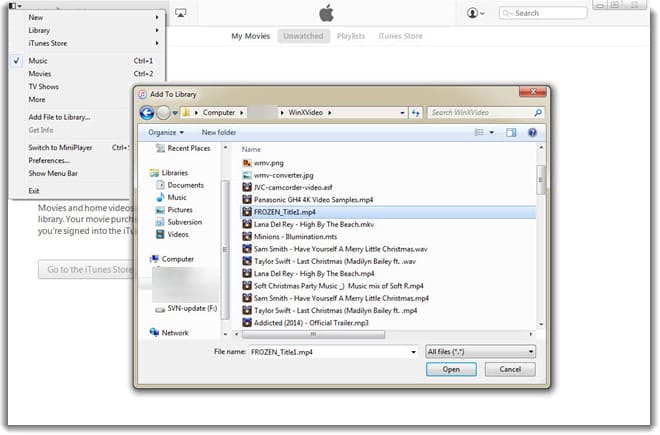
Step: Click “Alt” on your system's keyboard to open the menu bar > select “File” on the top menu bar > click “Add file to library” / “Add folder to library” if all the DVD movies have been stored in the single folder. Then, you can browse through the DVD videos on your system to select them. Otherwise, you can drag the DVD file/ folder into iTunes movies Windows.
On Mac
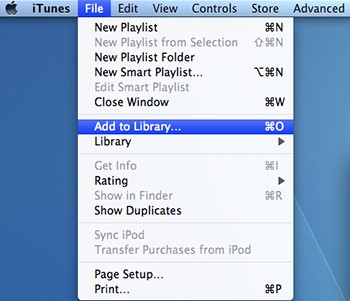
Step: Go to the “File” section > select the “Add to Library” option > browse through the options and add all of the converted DVDs to the iTunes library. The iTunes 12 version will automatically classify them in the Movies category. You can also use the drag-and-drop option to import DVDs to iTunes on Mac.
Under the “Home Video” channel option, you will find the movie video and sync DVD movie video using your iOS devices via Wi-Fi or USB cable. For the synchronization between iOS devices and iTunes on PC and Mac, you can see the link https://support.apple.com/en-us/HT204599
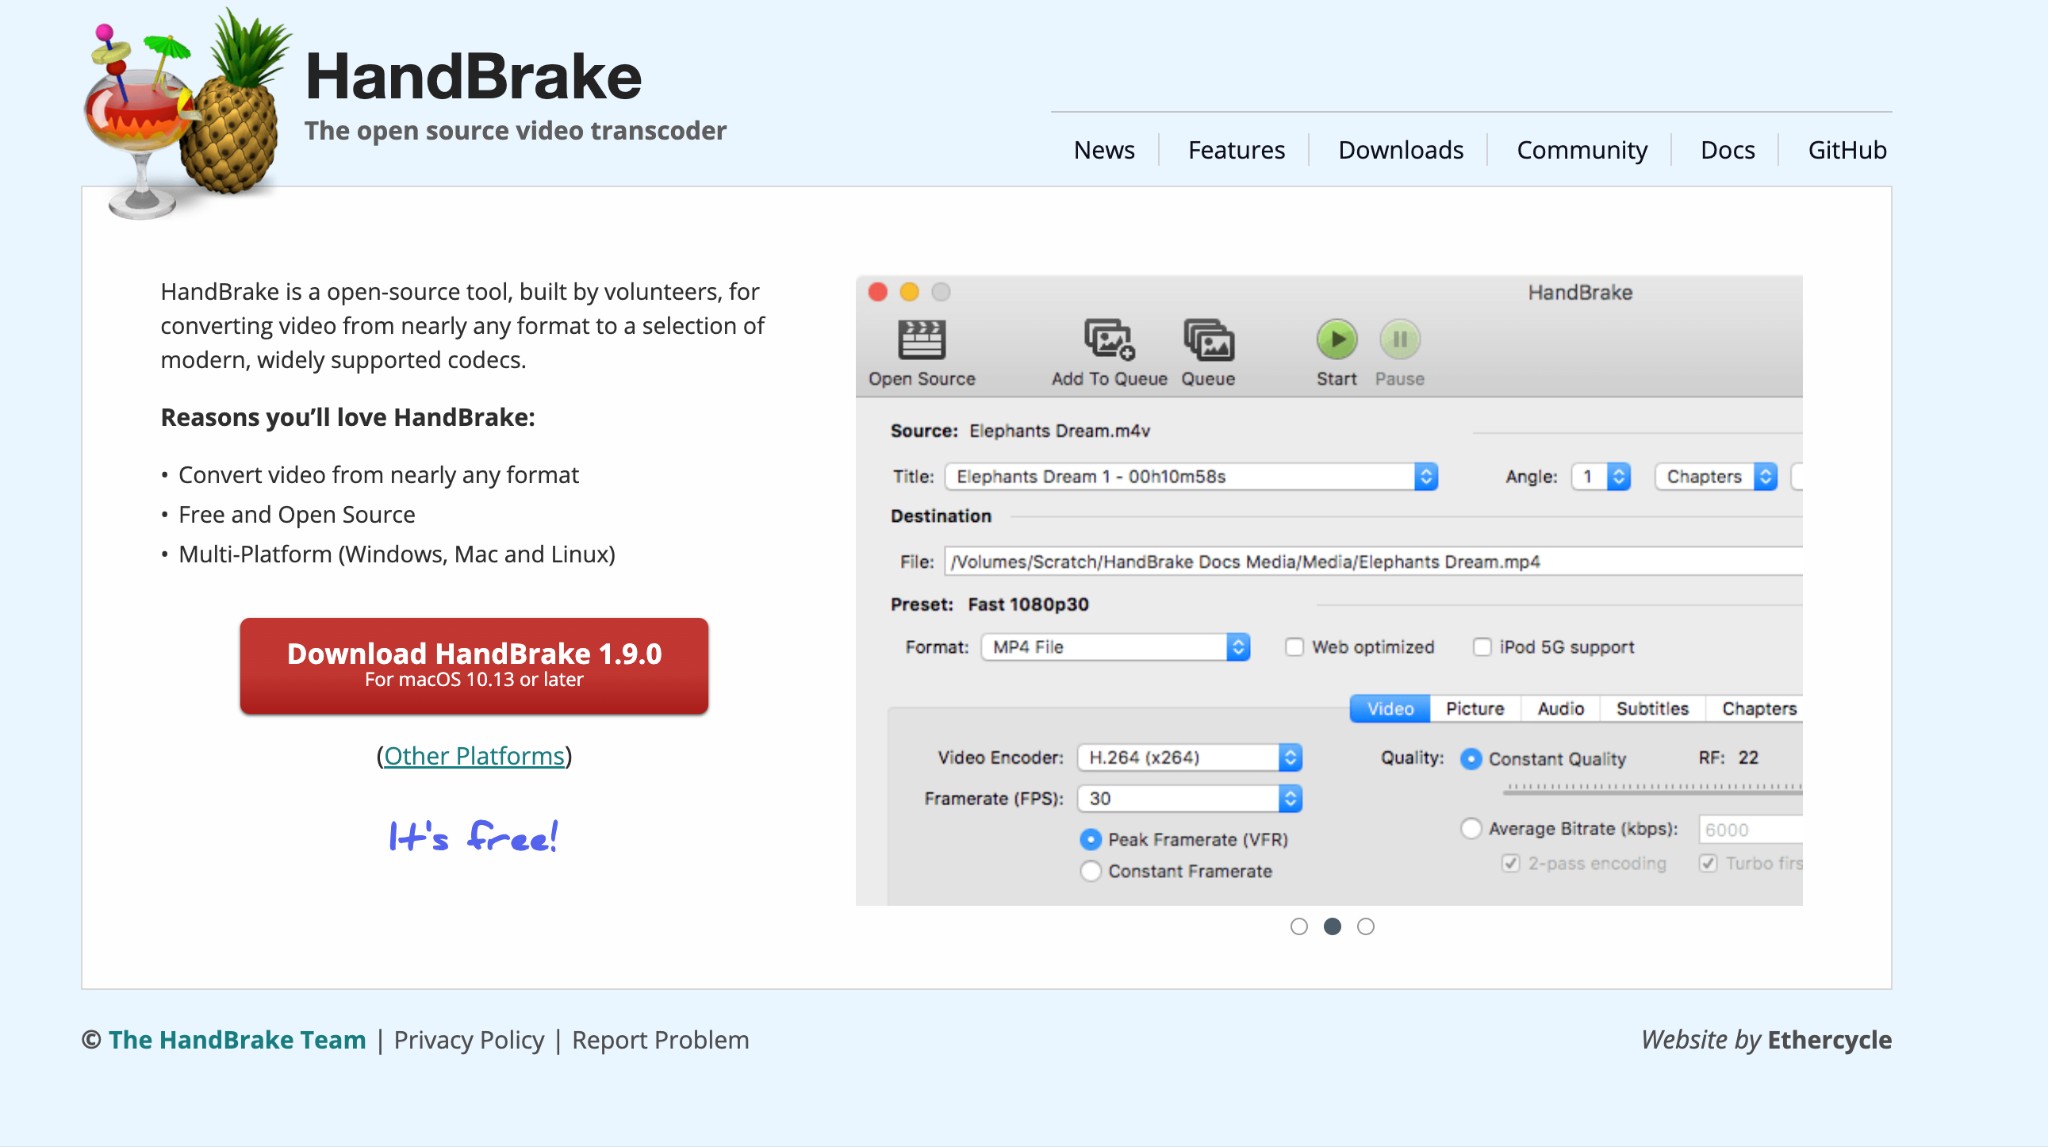
How to Transfer DVDs to iTunes for Free: HandBrake
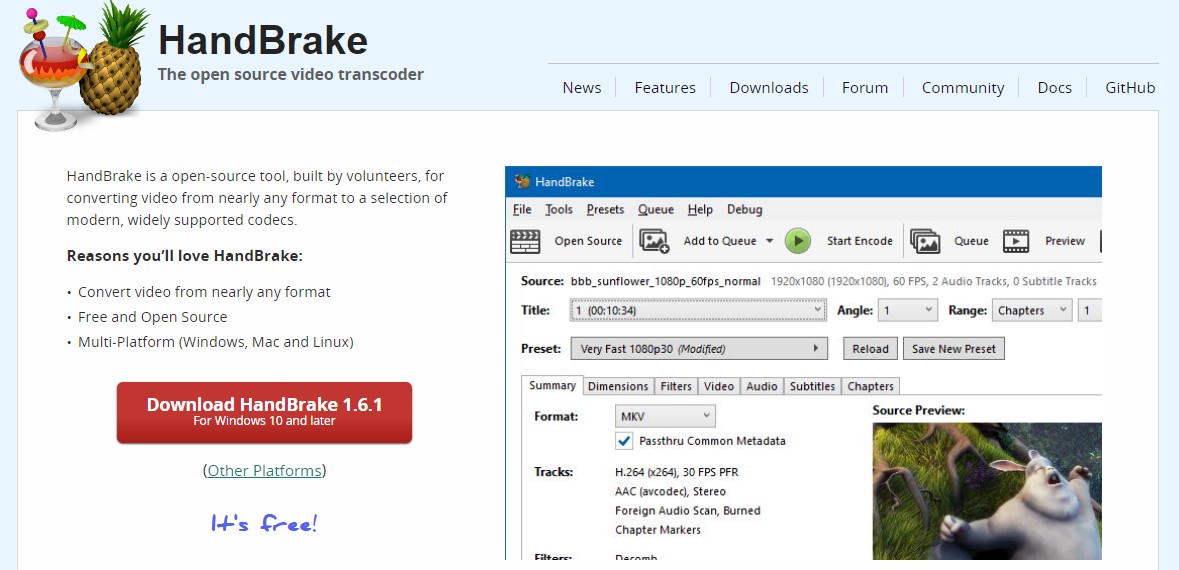
For putting DVD onto iTunes for free you can try the open-source free DVD ripper HandBrake with its flexible features. It lets you rip DVDs for iTunes with built-in device preset options. Along with DVDs, it also enables you to convert Bluray to iTunes, but it cannot rip any copy-protected DVD. It offers standard high-quality conversion while maintaining the original quality of your DVD. It lets you enjoy multiple video filters such as Denoise, Deblock, Cropping, Decomb, etc.
Pros of HandBrake:
- It offers various output formats such as DVD to MP4
- Chapter & range selection option with chapter markers
- Batch scanning with encodes queueing option
- Subtitle adding option with VFR & CFR support
- Explore Live static with a video preview option
Cons of HandBrake:
- Dedicated video editing option is not available
- The batch scanning process is a little complicated
Steps to Putting DVD onto iTunes
Step 1: To initiate the process of how to transfer DVDs to iTunes, first you need to convert DVDs to iTunes. You need to launch the HandBrake program on your system and insert DVDs.
Step 2: Within a few seconds, the program will automatically scan your DVD titles. After importing the DVD, head to the preset, then Devices, and select Apple 720p30 Surround.
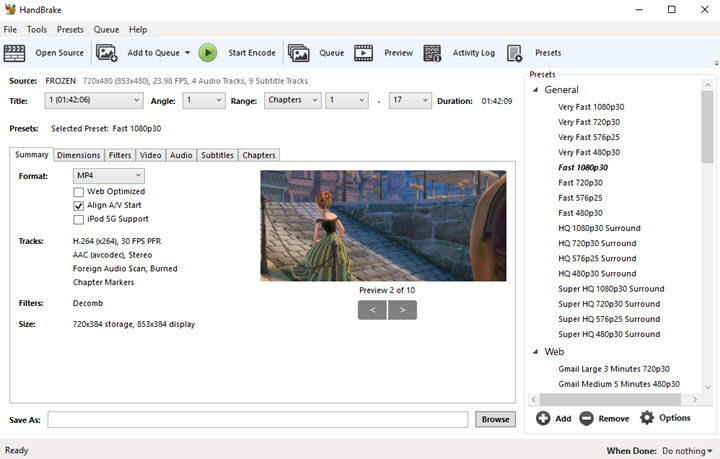
Step 3: You can also try more video settings by going to other sections. For instance, in the Video Section, you can customize frame rate, bit rate, video encoder, etc.
Step 4: Once you are done with the Settings, select the Green Button > select “Start Encoder” to initiate the DVD ripping process to iTunes. The progress bar lets you monitor the DVD ripping time.
How to Convert DVD to iTunes with WinX DVD Ripper
To experience ripping DVDs to iTunes, WinX DVD Ripper Platinum is a very flexible program with various customizations. It can handle any type of damaged, scratched, old, or outdated DVDs. After ripping DVDs to iTunes, you can play them on multiple devices. It supports built-in editors with various parameter settings options to customize your DVD.
Pros of WinxDVD:
- Remove any copy-protections from DVD
- You can rip DVD to MP4 on Mac in 1:1 ratio
- It offers high-quality ripping in compressed & small file size
- It lets you rip DVD to iTunes in MP4, H.264, or HEVC format
- With GPU acceleration, you can rip a DVD to a MPEG 2 file in 5 minutes
Cons of WinxDVD:
- The free trial version lets you rip only 5-minutes video
- Advanced features are available in the free version
Steps to Ripping DVD to iTunes
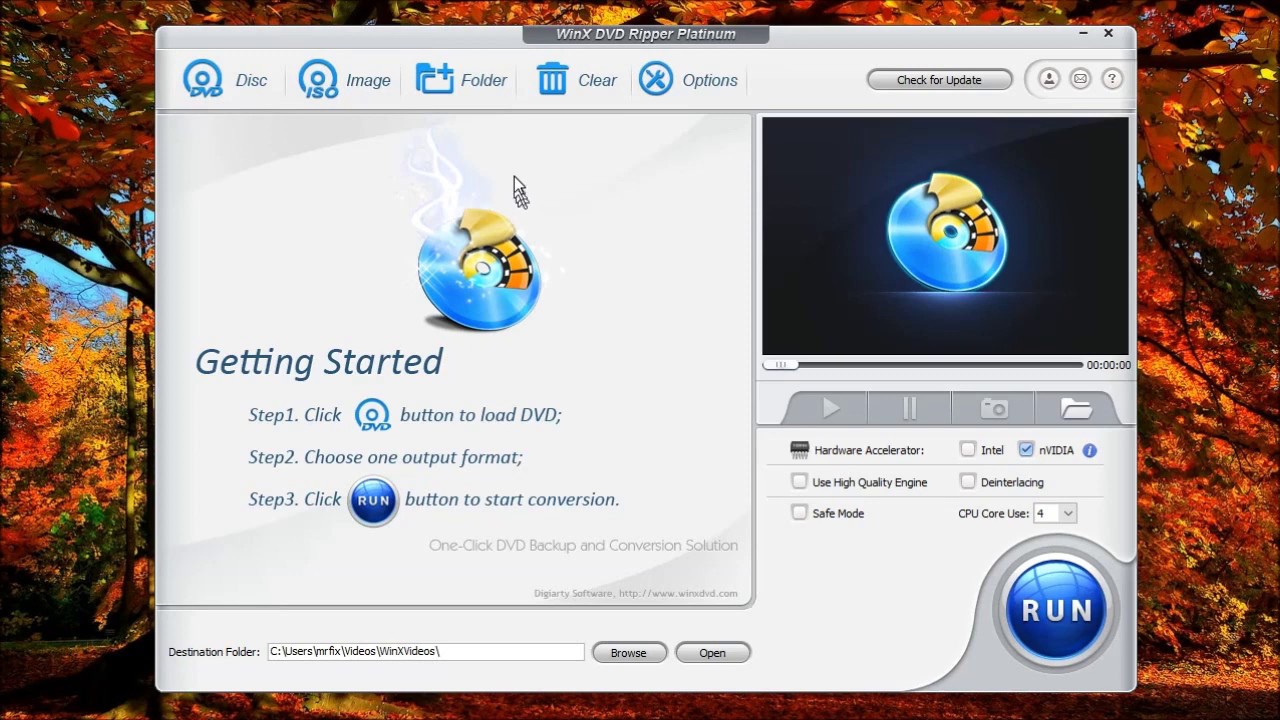
Step 1: After launching the DVD on your system, insert your preferred DVD into the optical drive > select the DVD disc option in the main interface for uploading the DVD titles. To upload a DVD folder, you must select “Folder.”
Step 2: The “Output Profile” window will pop up. Head to the “Device Profile” section, hit “Apple Device,” > and select your iPhone or Mac device. Then click Browse to select the folder to save your ripped output file. Hit “Run” to initiate the DVD-ripping process on your iPhone or Mac.
Conclusion
If you want to enjoy your entire DVD collection on your latest iPhone, Mac, or PC without carrying any physical DVD, putting DVD onto iTunes is the best option. While doing this, you can explore the maximum flexibility and customization of the DVDFab DVD Ripper with its high-quality ripping output. What's more, this blu-ray ripper helps you convert blu-ray to iTunes with lossless quality.


