Sharp Photo [Increase Photo Resolution Online & Offline]
Summary: In the face of blur png or jpeg, how to enhance a photo free and fast? You can learn how to take good photos with a digital camera or ask an image enhancer for help to get a sharp photo. Now there are photo sharpener online and sharpen photo editor offline provided. Choose the best image quality enhancer tool and sharpen a photo based on your need.
Table of Contents
What to do in photo taking to avoid blurry people and dim objects? Do you have a good knowledge of sharp photography? In order to get a sharp photo, an advanced camera is an option. Besides, you can also use a sharpen photo editor to increase photo resolution online or make photos clearer offline. Read this article and see how artificial intelligence works to sharper image.
How to take a sharp photo with a camera?
When we take photos using a camera or smartphone, it is common to get a blurry image instead of a sharp photo. Why are my photos not sharp? Truth be told, photo taking calls for skills and wrong operations will cause photo blurry. Now take a camera photo as an example. You should meet such six requirements to make photos clear.
How to take good photos with a digtial camera:
- Avoid camera shake to get a sharp photo
- Make sure the subject is well in focus
- Lessen the effect caused by bad air and light quality
- Adjust the depth of field properly
- Control the shutter speed against the motion blur of subject
- Obey the golden rule related to lenses and shutter speed
As for how to reach the required standard to get sharp photo, there are specific instructions in the article of Unblur Photos. Click the link and you will find the best answers in the first part.
How to sharpen photo through photo enhancement and photo restoration?
There are three parts to show you the difference between such two concepts. And you will be familiarized with the common methods used to get sharp photo through the two ways.
Image enhancement vs. Image restoration
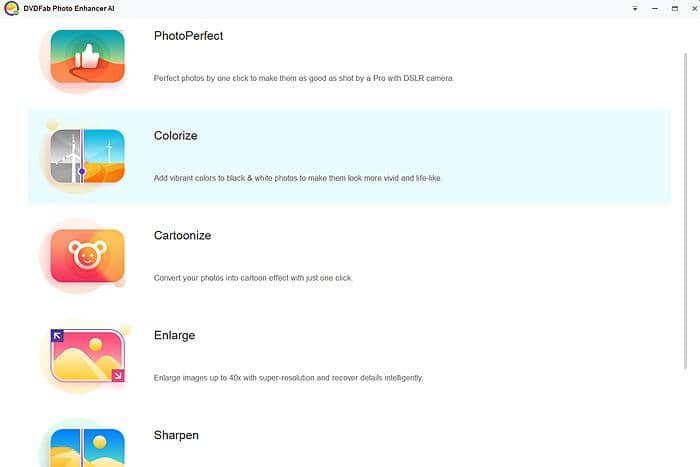
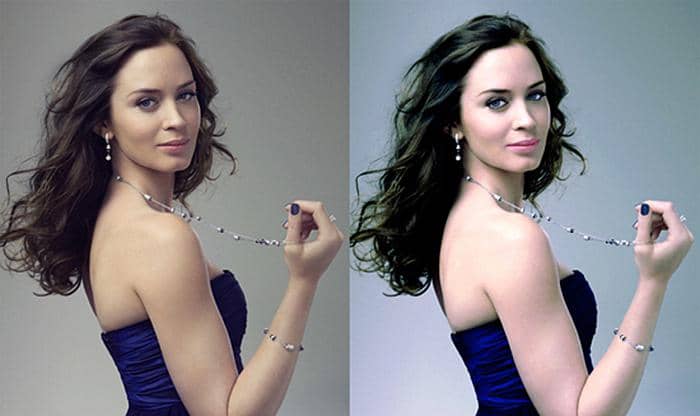
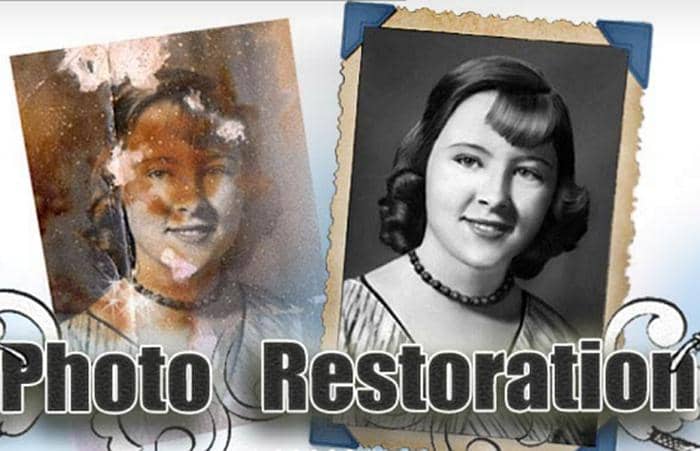
Turning blurry image to sharp photo needs photo enhancement and photo restoration. What is the difference between photo enhancement and photo restoration? Simply speaking, photo enhancement is to add color, contrast, noise and details to your file, while photo restoration is to remove scratches, blur and noise from your photo. The former is to make photo look better than a camera takes, while the latter is make photo close to ideal fidelity.
Common methods for image quality enhancer
- Correct exposure level to sharp photo
- Adjust color balance
- Increase sharpness (Zoom in/out)
- Crop the photo
- Remove unwanted objects

Common methods for photo restoration
- Turned damaged photos into complete
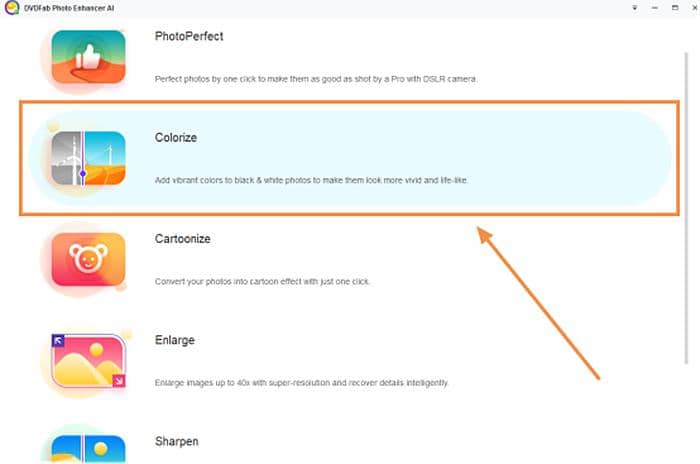
- Add color to photo
- Delete something unwanted in a photo
- Restore photo through age progression
3. How to sharpen a photo through photo enhancement & restoration
After knowing the key role of photo enhancer and photo restoration in getting a sharp photo, would you like a photo sharpener able to upscale image, remove blur and adjust color, brightness and more in your file? Here is a program helpful for photo sharpen from such aspects.
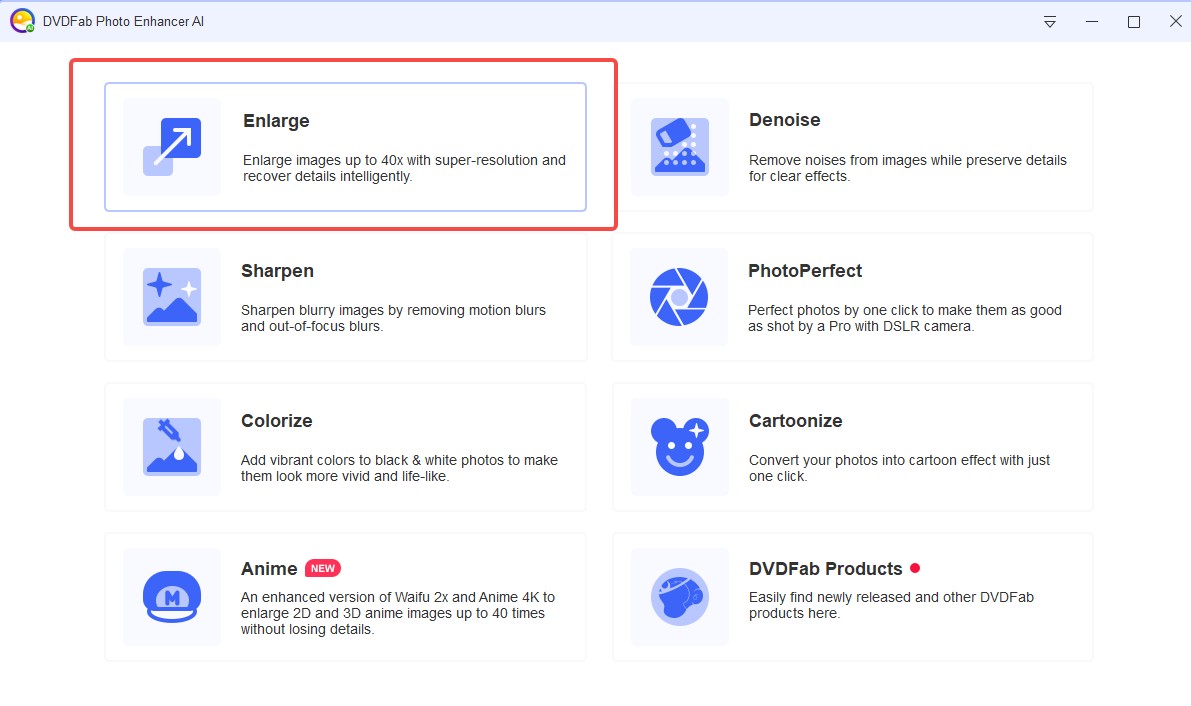
Instead of adjusting your camera and start photo taking another time, DVDFab Photo Enhancer AI enables you to sharpen photo on Windows to the best of its ability. With the assitance of this sharpen photo editor, you can enlarge images 40 times by adding more details, sharpen photo by removing motion blur and out-of-focus blur, as well as denoise by making photos clearer in background, color and luminance. Now let’s see how to get a sharp photo with this software which offers a 30-day free trial and allows you to process 5 images under the modes of “Enlarge”, “Sharpen” and “Denoise”.

Enlarge photo with DVDFab Photo Enhancer AI
Step 1: Get DVDFab Photo Enlarge AI downloaded on Windows
Step 2: Click “Enlarge”and download AI model for sharp photo
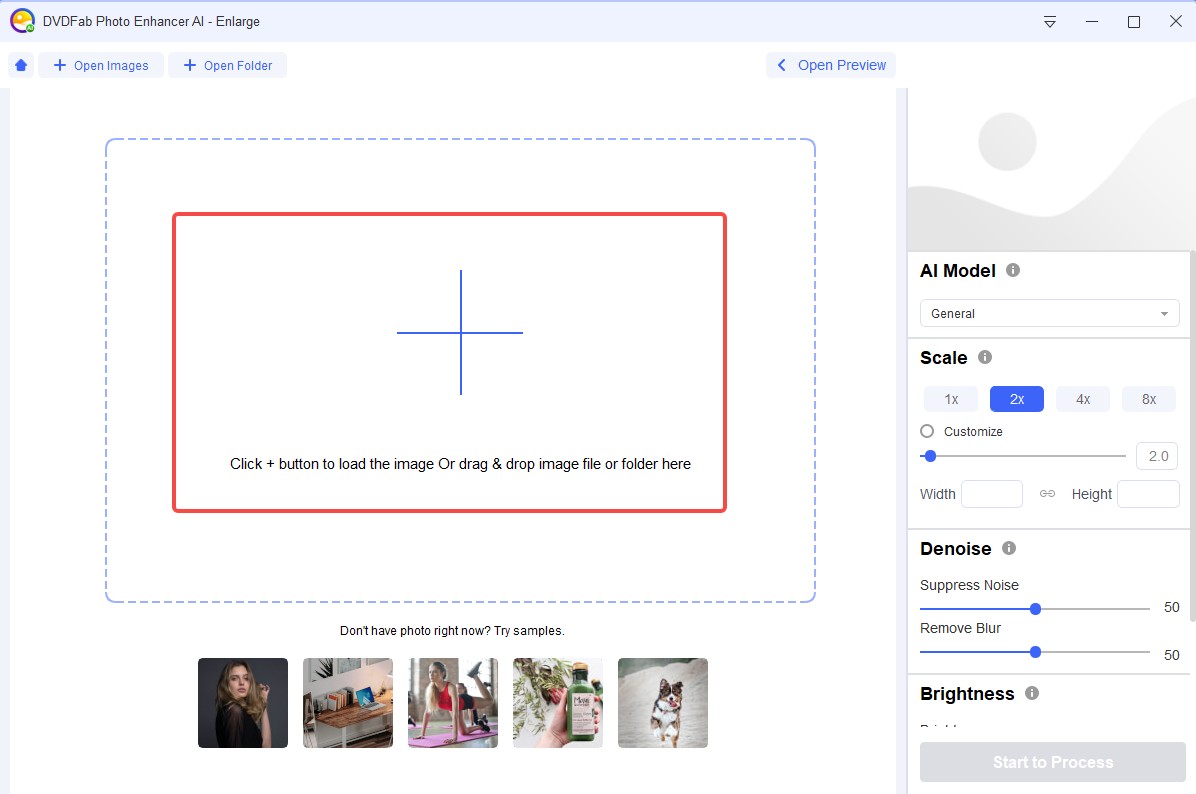
Step 3: Import your blur photo through “Open Images”. Or, you can also drag your blurry photo here directly.
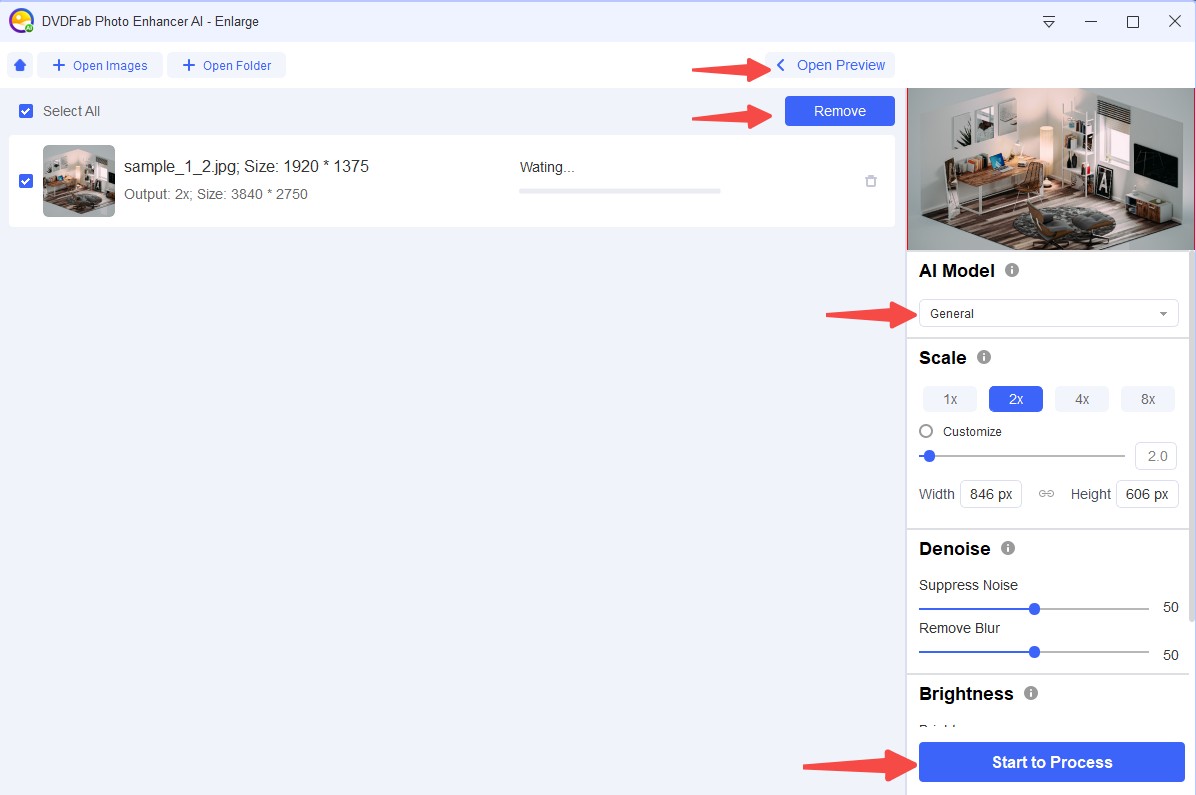
Step 4: Review the photos and choose the proper AI Model, and then you can "Start to Process".
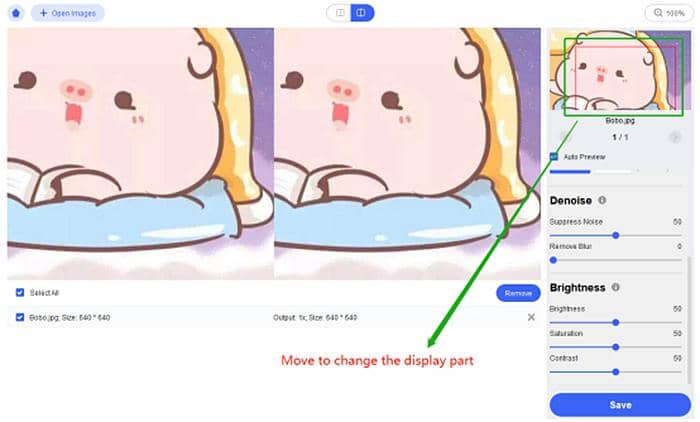
- Split & side by side
They are two display modes when you are processing sharp photo. “Split” mode displays a photo in one window and uses a line to separate sharpened photo and unsharpened part. While “Side by Side” mode displays two photos in two windows and you can preview the obvious changes after “photo sharpen”.
- Scale
Zoom in or zoom out your photo using the options of “0.5x, 2x, 4x, 6x”. Or custom the value from 1 to 40 based on your needs. Then a blurry image will become a sharp photo immediately.
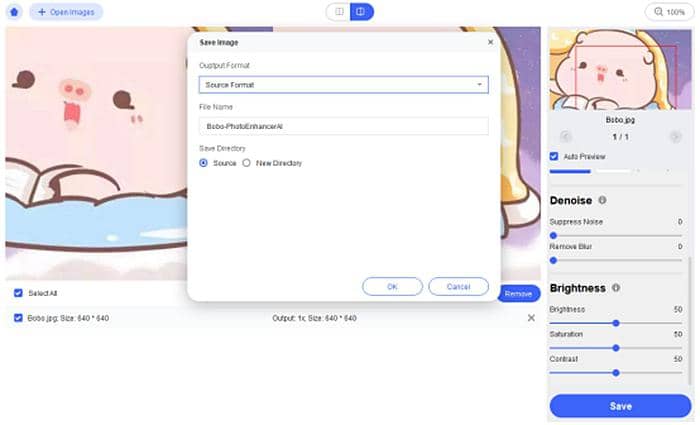
- Denoise
Allow you to suppress noise and remove blur by adjusting the value from 0 to 50.
- Brightness
Sharp photo by setting the values of brightness, saturation and contrast ranging from 0 to 50.
Note: There is a rectangle in the small windows on the right. You can move it to change the display part of your photo. Once you move it or set any option on this interface, the changes will be manifested. The left windows stands for the source image, while the right refers to the sharp photo.
Step 5: Click the button of “Save” in the lower-right corner
After clicking “Save”, you will be asked to set the output format, file name and save directory. Here the options for output format includes “png, jpg, jpeg, tif, tiff”. Which format you want for your sharp photo? Finally, click the button of “OK” and this sharpen photo editor will work fast to generate output picture.
Sharpen photo with DVDFab Photo Enhancer AI
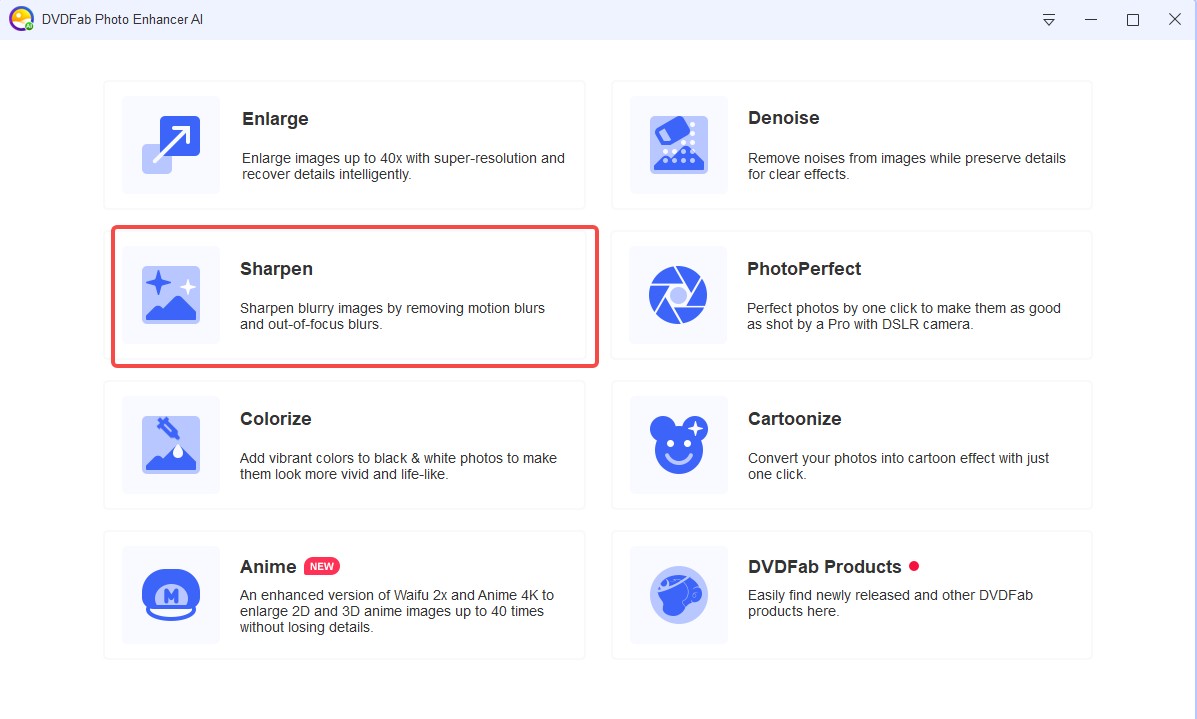
Step 1: Click the button of “Sharpen” on the main interface of this sharpen photo editor and wait for AI model download. AI technology is key to a sharp photo.
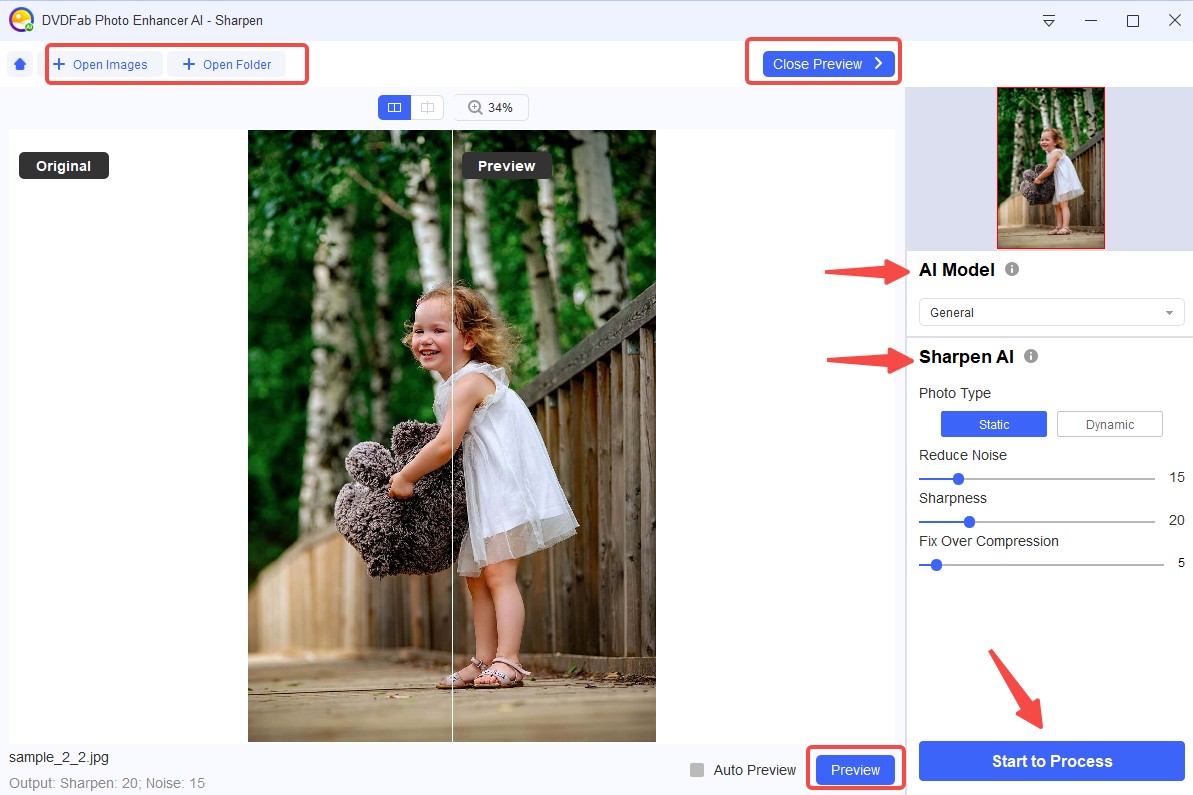
Step 2: Import blurry photo from “Open Images”
Step 3: Move the rectangle to focus on a special part of your photo
Step 4: Adjust the value of “Sharpness” and “Suppress Noise” (0-100)
Step 5: Preview the effect of sharp photo
Step 6: “Save” and output your file in a preferred format
Denoise photo with DVDFab Photo Enhancer AI
Step 1: Click the button of “Denoise” and download AI model
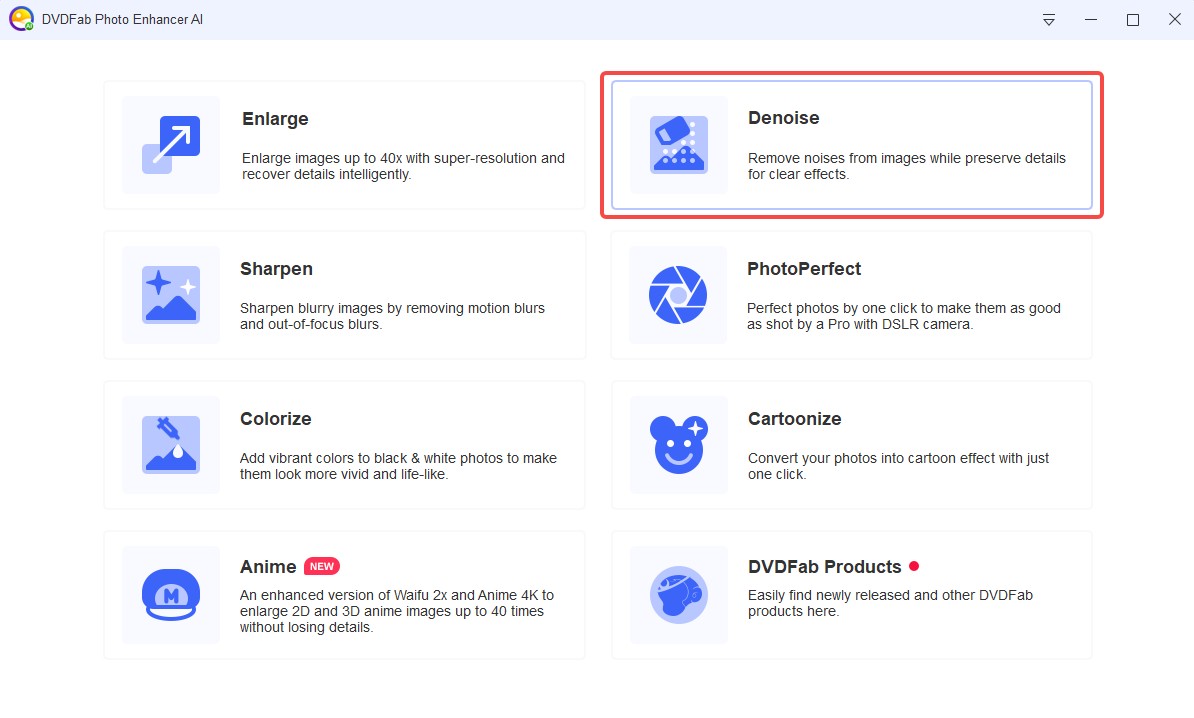
Step 2: Drag your blur photo to this sharpen photo editor
Step 3: Select a display mode (Split or Side by Side)
Step 4: Adjust the value of “Suppress Noise” and “Sharpen” to get a sharp photo
Step 5: Observe the changes in the right preview window
Step 6: Zoom the photo (optional)
Step 7: Save, name and choose an output format and directory
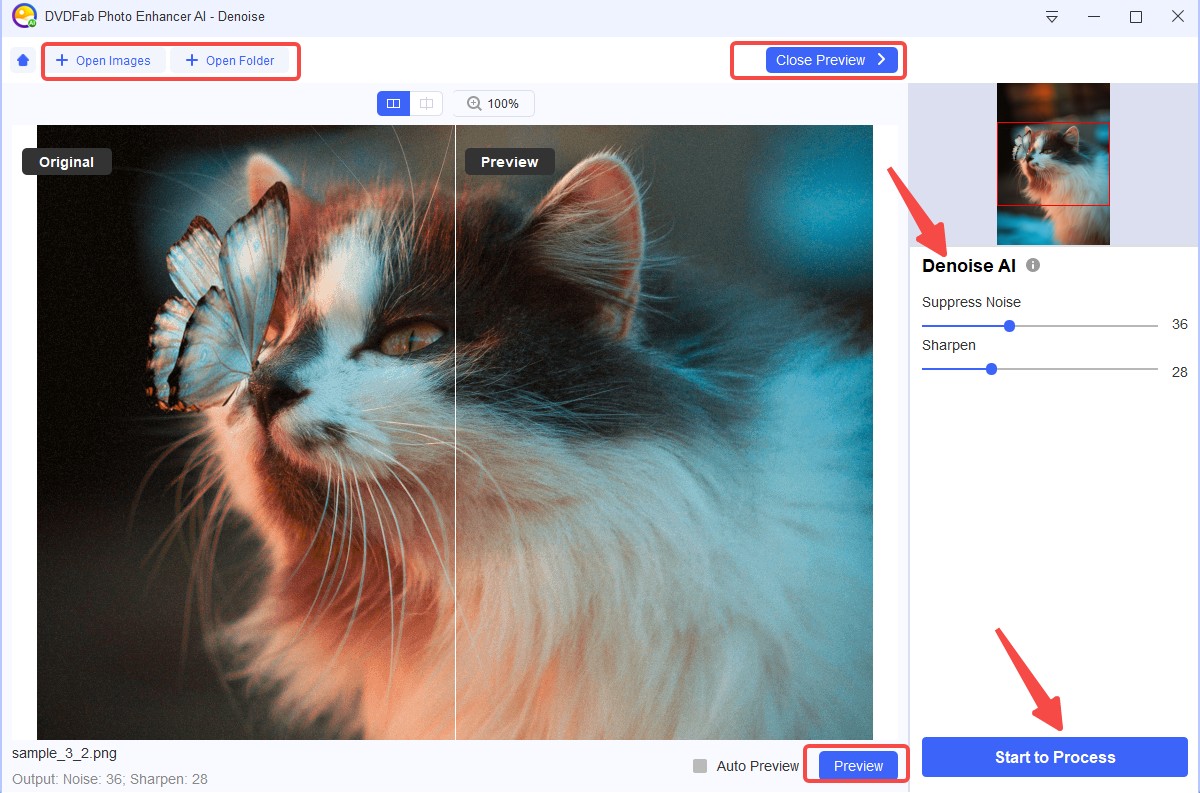
This is how to sharpen a photo with DVDFab Photo Enhancer AI on Windows. With the help of three buttons: Enlarge, Sharpen, and Denoise, you can enlarge images up to 40x with more details added, sharpen blurry images with notion blur and out-of-focus blur removed, as well as remove noise related to background, color and luminance. Through my illustration, don’t you think it is very simple and easy-to-use. Empowered by artificial intelligence, it is the best software to sharpen photo. Why not turning your blurry photo to sharp photo using it?
4. Conclusion
Have you had a full picture of how to sharpen a photo with a camera or program recommended in this post? With so many sharpen photo editors mentioned, DVDFab Photo Enhancer AI is the best choice, which assists you to enlarge images up to 40x, sharpen photos by eliminating all blur, and remove noises existed in color, luminance and background. Most importantly, its AI technology matters a lot which produces world-class sharp photo, defeating all the other competitors.

5. FAQs
(1) What is the best way to sharpen photo?
DVDFab Photo Enhancer AI is the best tool to get a sharp photo. It is free and easy-to-use, allowing to sharpen 5 photos at most. With the support of artificial intelligence, it works best in photo sharpen.
(2) Is there an online photo enhancer?
If you don’t want to install any software in your computer, Let’s Enhance, Fotor and Adobe Phtoshop Express are online sharpen photo editors you can use. See their main features one by one.
Let’s Enhance - AI image enhancer to produce a sharp photo
Pros:
Empowered by AI technology
Upscale images up to 16x without quality loss
Remove noise from JPEG
Con:
Limited in free version (15 megapixels, 15 megabytes for each photo)

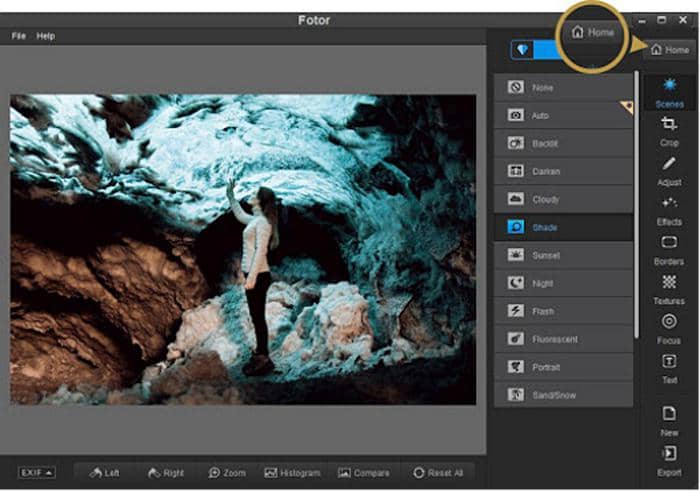
Fotor - No AI technology avaiable to make a sharp photo
Pros:
Sharpen photo with just one click
Level up images’ texture easily
Support exposure compensation and color correction
Con:
Only change photo resolution by zooming in and out
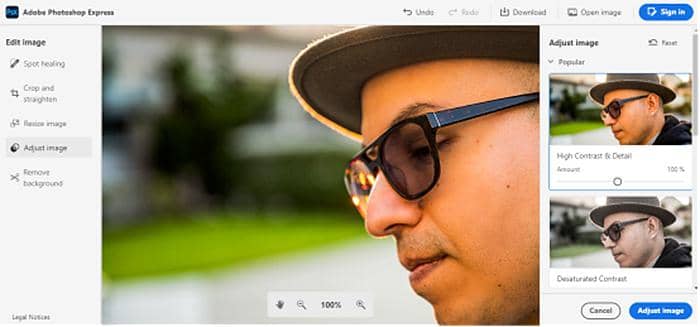
Adobe Photoshop Express - Photo enlarger online to make a sharo photo
Pros:
Offer lots of color, light, tone, etc. to sharpen photo
Provide numerous aspect ratios suitable for streaming websites
Allow you to resize a photo
Con:
Need money if you want to remove background
(3) How to sharpen a photo on Mac?
Sharpen photo editor available on Mac includes: Photoshop, Fotophire Editing Toolkit, Luminar 4, AKVIS Retoucher, BenVista PhotoZoom Pro 8, as well as PhotoScape. You can use any of them to get a sharp photo.
(4) Who did the best to improve video resolution
DVDFab Enlarger AI, supported by artificial intelligence, is able to improve video quality from 480p to 1080p and from 1080p to 4K as a video upscaler. Upscaled by 300%, your video images will become more crystal. Sharp photo, sharp video as well.


